Outdoor Home Maintenance Tips

While the weather is still pleasant, there's no better time to get outside and clean up the exterior of your home. Using a few maintenance tips, you can keep the outside of your house looking new and be prepared for the colder seasons. Staying up to date with home maintenance does more than give you the satisfaction of checking something off the to-do list.
Control4 points out that regularly scheduled repairs and cleaning lead to cost savings, a better quality of life, and an increase in your home's market value. Home maintenance also improves the safety of your home and extends the life of your appliances, landscaping, and many other areas. These things are all important and not to be ignored. In this article, we'll look at some key tips to help keep the exterior of your home clean and everything running smoothly. It will also let your home stand out with impressive curb appeal.
Inspect the chimney and roof
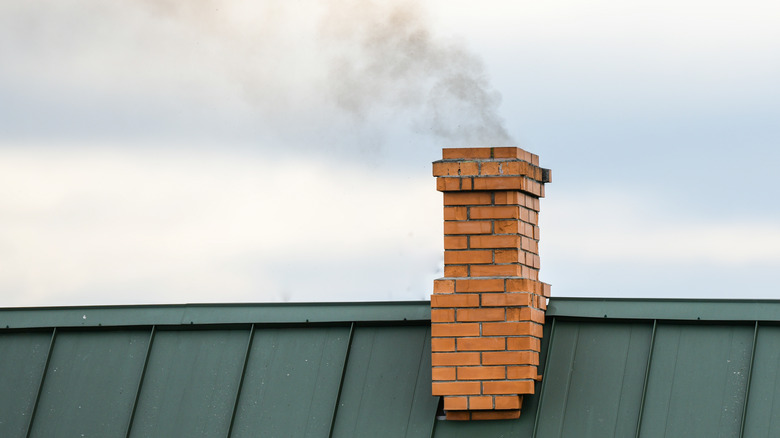
How often do you think about your chimney and roof? They may never enter your mind. Realistically, why would you look up there? And yet, one small mishap on a roof and you could have a leaky ceiling with water damage. It's important to have the roof looked at once a year to make sure that doesn't happen. You can inspect your own roof if you're comfortable doing so. While inspecting, American Home Shield's advice is to look for mold and algae, as well as shingles that are curled, buckled, damaged, or missing. You should also investigate the attic, as leaks in the attic are an indication of a roof issue. Of course, you can always hire a home or roof inspector to check out the roof for you.
Chimneys are a fire hazard if in need of repair. According to the Chimney Safety Institute of America (CSIA), the number one way to prevent a chimney fire is through yearly inspections. Again, you can inspect the chimney yourself if you're comfortable with it. If not, hire a professional. The chimney should be free of cracks, build-up of creosote (a by-product from burning wood), and any other damages. Also, the flue should be clear and not blocked. Get that inspection on your calendar today.
Clean out the gutters and window wells
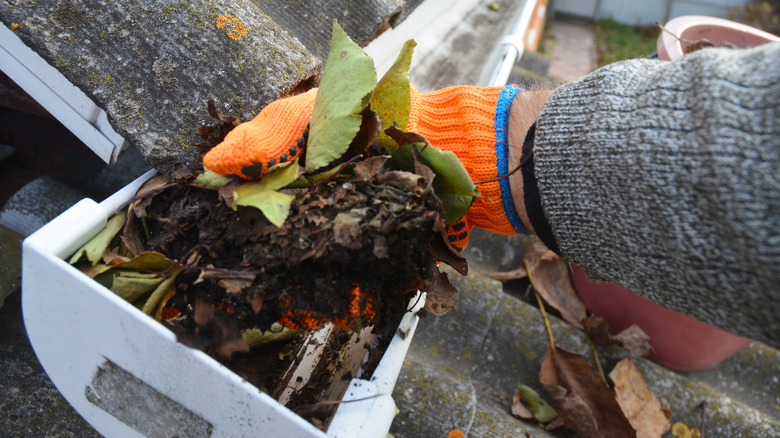
When gutters get clogged, the excess water runs off into the yard, window well, or worse, inside the home. With nowhere to drain, it can cause damage around the house. To clean your gutters, use a sturdy ladder to gain access, and wear work gloves to protect your hands. Simply pull the leaves, twigs, and other debris out of the gutters to clear them. While up there, inspect the gutters for any damaged pieces, such as cracks or areas that are dented. If your home is surrounded by trees, it's helpful to clean your gutters after fall, so you can collect all the fallen leaves that have gathered.
Cleaning the window wells not only helps prevent water damage, but also brings more natural light into your basement. Dirt and objects can block the drainage hole, as well as the sunlight, if not taken care of. Carefully climb into your window well and get started. Elite Restoration suggests a few steps for clean, happy window wells. First, while wearing gloves, clear out any debris. Use a shop vacuum to get the little stuff you can't grab. While hanging out in the well, go ahead and clean the egress window with a glass cleaner and some paper towels. Now that everything is clean, it's important to place a cover on the well. You can pick these up at a home improvement store. Place rocks or bricks on top of the cover to keep it in place. Covers are a great help in keeping the window well clean and preventing little creatures from making their home there. Clean the window wells a few times a year so it is a fast, easy project each time.
Power wash the siding and driveway
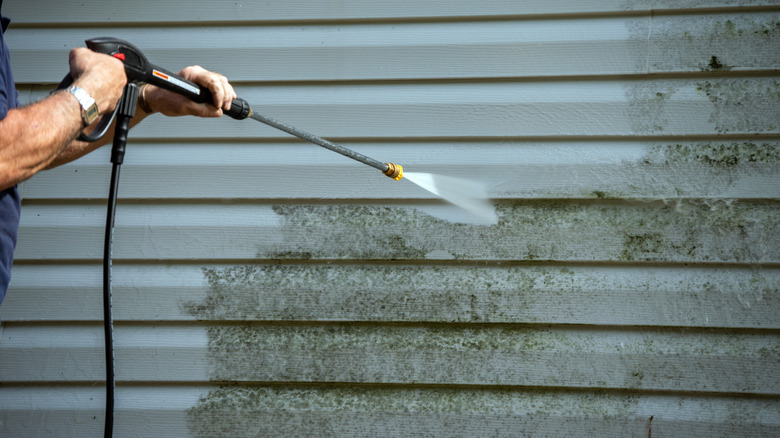
If you're looking for a fun outdoor maintenance job, grab a power washer. There's something satisfying about watching layers of dirt wash off the side of your house. Before getting started, remember that power washers require a knowledgeable user. You can get seriously hurt if you use it incorrectly. The Centers for Disease Control and Prevention (CDC) warns users to never point a power washer at themselves or anyone else, and not to use it to move objects around. Also, keep cords and connections out of standing water, wear protective shoes, and never allow children to operate or be near the power washer.
Once you understand how to use it safely, you can begin washing away months, or maybe even years, of dirt and grime around the exterior of your home. Use the power washer to clean your home's siding. Wash from the highest point you can reach, moving the washer hose gently from side to side, and work your way down to the lower points of the house. Once the siding is done and you've finished admiring your work, spray your driveway to reveal a new shade of concrete. You can move on to the sidewalks after that.
Paint whatever needs a touch up
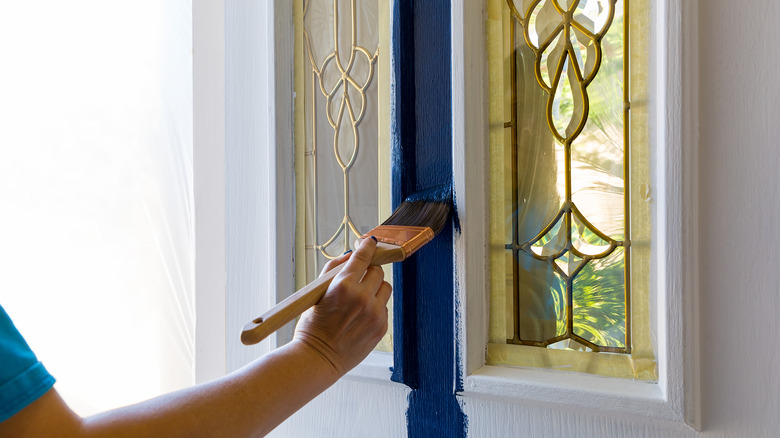
It's wise to store any leftover paint after using it around the house. That way, it's easy to touch up things like the exterior doors, trim, and fence. Benjamin Moore shares that paint has a shelf life of about two years. Before sealing it up after use, clean the lid and rim around the can thoroughly for better results. You can also store lesser amounts of paint in small containers with lids. Label your containers so you easily know where the paint is used around the house. If you don't have extra paint sitting around, grab a piece of the peeling paint outside and bring it to a paint store that can match it.
Areas to look at when performing exterior home maintenance are the mailbox post, fence, doors and the trim around them, windows and window trim, and any other areas on the exterior that use paint. Once you've determined what needs painting, it's time to assess the damage. Touch-ups are for spots that just need a little dab here and there. It works well if you keep up with it every year. If you've fallen behind with your exterior maintenance, some areas may require a completely new paint job. Look at how much the paint is peeling. For example, if the trim around an exterior door has chunks falling off or none of the trim has a smooth spot with no peeling paint, it may be best to scrape off the old paint and go from there. In the end, although a fresh new paint job on your home takes longer, the results will be worth it. For any area you paint or touch up, first sand it to make it smooth, then wipe it clean before painting.
Wash the outside of the windows
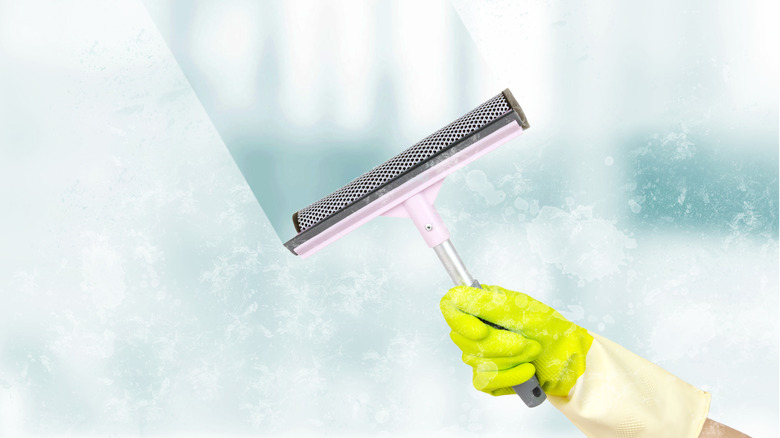
Sometimes, homeowners don't realize how dirty their windows are until they clean them. Keeping windows clean does more than give you a better view — it also helps maintain your windows so you can avoid further maintenance and keep your windows functioning properly, according to Pella. While cleaning, you'll have a chance to notice small damages before they get bigger. Also, keeping the grime out of the window tracking and hinges prevents damage and improves the operation of your windows. Plus, if you clean windows regularly, each time will be easy and quick.
Start by removing and cleaning the window screens. Lay them in a sunny area and wash them with soap and water, then rinse thoroughly with a hose and allow them to dry in the sun. Next, with a bucket of soapy water and a clean rag, start washing every area of the window, including the trim, glass, hinges, and tracking. Wipe the glass clean and dry, then clean with a spray glass cleaner until a rag or paper towel comes clean. Some people prefer to use newspapers for this step to avoid any lint from rags or paper towels. Once the screens are dry, you can put them back in place. If you notice any screen damage, now is the time to get your screens repaired.
Scrub the grill

With summer in full swing, grills are in use now more than any other time. In between Saturday night hot dogs and Sunday BBQ chicken, give the grill a good cleaning. You can also save this job for when it's time to, sadly, pack away the grill for the cooler months. Pro Grill warns BBQ enthusiasts that ignoring the cleaning needs of a grill can cause damage. You won't have a chance to notice minor maintenance needs and concerns if you never take the time to inspect it as you clean it. Removing grease and gunk can reveal things like a loose gas line or rust on a grate. Food won't taste as good on a dirty grill, and it's likely to collect plenty of bacteria. You could also be allowing a family of small critters to live in the grill if it sits there untouched.
To get started, get a good, stiff scrub brush designed for grill cleaning. After that, you need a bucket of warm, soapy water. Remove the grills and start scrubbing, rewetting the brush as needed. Afterward, use a rag to wipe away everything that the brush has loosened up. You can clean the inside of the grill in the same way. Wash the outside of the grill with dish soap, water, and a soft rag. You can shine the outside with a glass cleaner or a stainless steel spray as well.
Stain or paint the deck
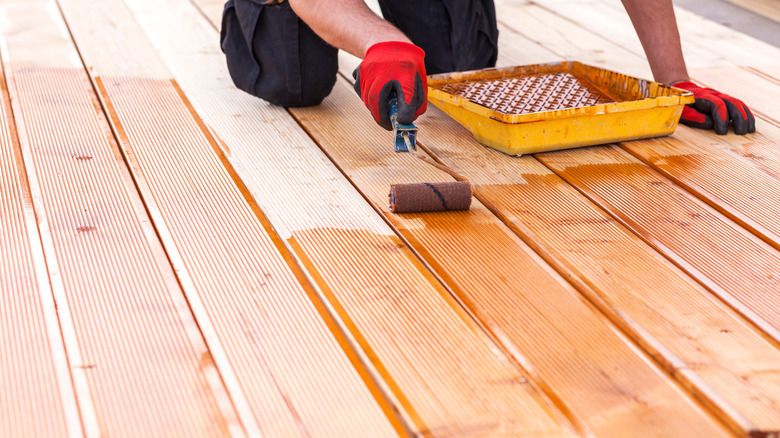
The longer you let a deck go without staining it or painting it, the more difficult the project becomes. Watch for signs that your deck is ready for a fresh coat. Five Star Painting says you should re-stain your deck when the existing stain starts to fade, or if you see signs of mold or mildew. Also, watch to see how the deck reacts to water. If it isn't beading up on the deck, it's probably time for a fresh coat.
To stain your deck, clear everything off, then sweep and sand down the wood. Wash and let it dry — and now the deck is ready to stain. Apply a deck stain using a roller brush for large areas and a trim brush for the harder-to-reach spots and smaller areas. Repeat as necessary to get the color you want.
Painting the deck is similar to staining; however, before doing so, here's what to look for if you're wondering if the deck truly needs to be repainted. Paint the deck when the old paint shows signs of bubbling, peeling, or flaking. Clean and sand the deck just as you would if you were staining. It may require extra sanding if the peeling is bad — you want the wood to be smooth. The paint is also applied in the same way. Thankfully, deck paints often only require one coat, especially if the deck has been painted before.
Clean up the yard and garden
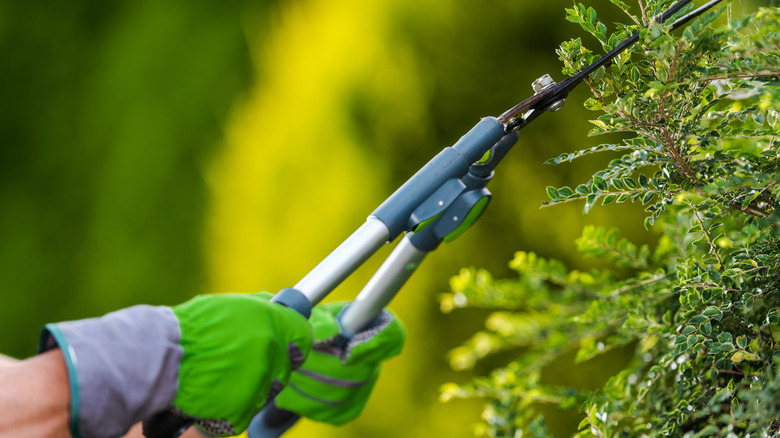
During the summer, the plants and bushes in your yard can grow like wildfire and can take over the yard if you aren't careful. Grab your pruning shears and a weed whacker and start trimming things up. Don't worry about hurting your shrubs. If they look out of control, just trim them with your shears until you get the desired shape you like. When looking at shrubs, pay attention to how they're doing. How do you know if a shrub is worth saving? Master Lawn suggests scraping some bark off the shrub to see what's underneath. If you spot a green color, your shrub is alive. If it's dry with no color, it may be dead. You can also try bending a branch. If it has a slight bend to it, that's a good sign. If it's dry and brittle, the shrub isn't healthy. Dead plants should be removed in case they have a disease.
You can pull most weeds by hand unless they've been allowed to grow like crazy and the roots are deep. If that happens, use a weed whacker to cut it down and then a garden shovel to dig the weed out by the root. Getting rid of weeds helps your other plants to flourish. Pull off the dead heads on flowers so new ones can grow, and, of course, water anything that needs it. After pulling weeds, it's the perfect time to lay down fresh mulch or rocks so you don't get a new batch of unwanted growth.
Clean out the dryer exhaust
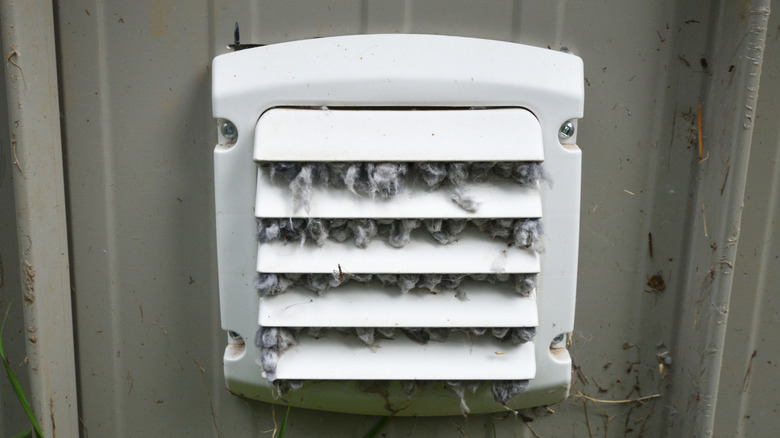
Even if you regularly clean the lint out of the dryer from the inside, you aren't getting all of it. Regular home maintenance should include cleaning out the vent from the outside as well. Too much trapped lint can cause problems. Home Inspection Insider states that dryer lint is toxic for humans and pets. That's one of the reasons there must be a dryer vent that leads outside. Be sure you have one in place, and then keep it clean when doing your outdoor maintenance.
What is all that gross lint, anyway? Popular Science tells us that lint is made up of the small bits of fabric fibers that escape from our clothes when they're washed. During the dryer cycle, the lint is released as the clothes tumble and dry. To rid your home of toxic lint and keep your dryer vent clean, you can use your hand or a brush with a long handle to pull the lint out of the outside vent. Once it's cleaned, wipe the vent off with a damp rag. While cleaning the vent, check it out to make sure the hinges are not rusty and are operating smoothly. You can spray a little WD-40 if they are stuck.
Repair the driveway
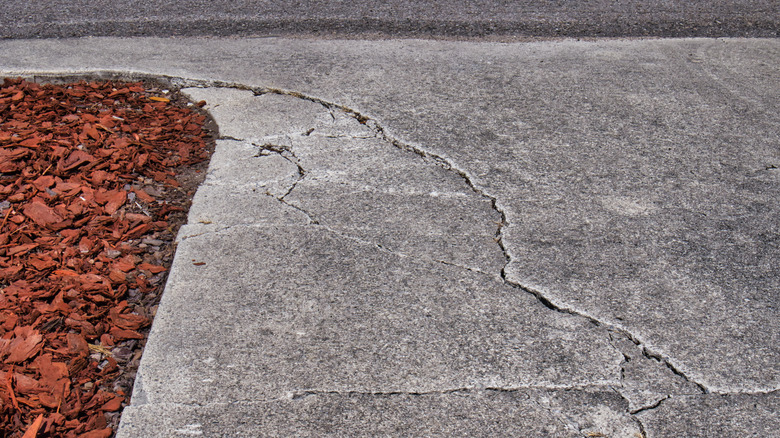
Small cracks soon become big cracks when left alone. Fill them in and keep your driveway looking like new. If you don't think the driveway is a big deal, think again. Joe Raboine, director of residential hardscapes at Belgard at Oldcastle APG Inc., told U.S News & World Report, "Though they may seem trivial, driveways are a big part of your home's curb appeal. They aren't just functional but can add to the overall aesthetic. The materials and processes that go into creating an attractive, functional driveway deserve more attention than they are often given." Your driveway matters.
When the cracks in your asphalt or concrete driveway are ¼ inch or less, you can repair them yourself. If they're larger, you may have a more serious issue on your hands and need to call in a professional. That's why maintaining the driveway with yearly upkeep is helpful. You can pick up concrete or asphalt crack fillers at home improvement stores — they aren't difficult to use. Clean the driveway first (do your pressure washing before crack inspections), then fill the gaps with the filler and allow it to dry. It's that easy.
Make sure nothing is leaking
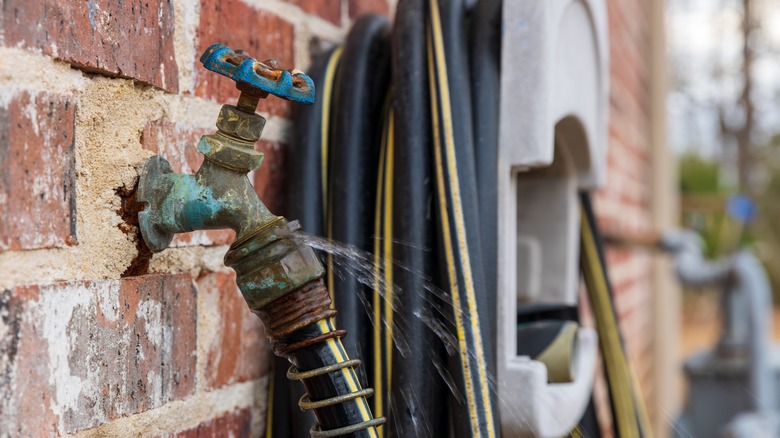
Hoses and spigots that leak are wasting water and increasing your water bill. Yep — that little spray coming out of the side of your garden hose is costing you money. The Pink Plumber writes that depending on the size of the leak, a leaking garden hose could waste as much as 30,000 gallons of water per month. Yikes! Don't skip such a simple outdoor maintenance task when it can make a big difference in water conservation.
The best way to discover if the hose is leaking anywhere is to stretch it out in the yard and let the water run. Look for sprays of water coming from areas that shouldn't be emitting water. If the hose is leaking, you can use electrical tape for a small repair. If it's a bit larger, try a hose mender, which is just a plastic or metal tube that wraps around the leak. Since garden hoses are fairly inexpensive, it's sometimes easier to buy a new one, depending on how bad the leaks are. If it's the coupling (the metal piece that attaches the hose to the spigot) that is leaking, you can try replacing the gasket inside of it or the entire coupling if that doesn't work. Sometimes, the coupling just needs to be tightened with a wrench. You'll know there's a coupling issue if water is spraying out from under it when it's attached to the spigot. Next, check the spigot for leaks. Do this by turning on the outside water, then turning it off, as stated in Promaster. If you see water continuing to come out of the handle or spigot, you probably just need to replace the washer inside the hose bibb.