How To Successfully Clean Wrought Iron Furniture And Railings
Wrought iron furniture never goes out of style; its classic appearance befits contemporary and rustic interior styles alike. Homeowners place wrought iron in indoor and outdoor settings, although it is more commonly found on patios, decks, and balconies. According to Hayneedle, the material is durable and hardy, making it ideal for withstanding outdoor weather, although being outside makes dust and dirt buildup inevitable.
Furniture makers and hardware professionals recommend cleaning wrought iron furniture as it becomes visibly dirty, though you can clean it as often as you like. The better you upkeep your belongings, the longer they will last aesthetically and functionally. Doing a deep clean of your furniture should only take one to three days, depending on the size of your set and its current condition. If it's in mostly good shape and just needs to be cleaned up, you'll finish in a couple of hours. However, the process will involve restoration if there are signs of rust and chipping paint. Here's how to do it.
Step 1: Gather tools and cleaning supplies
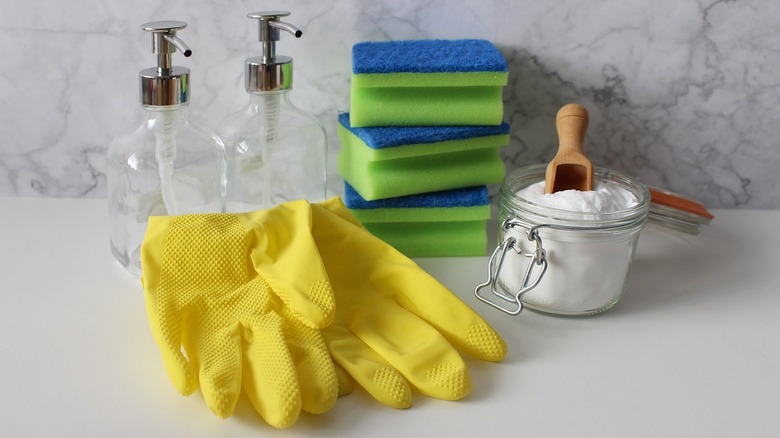
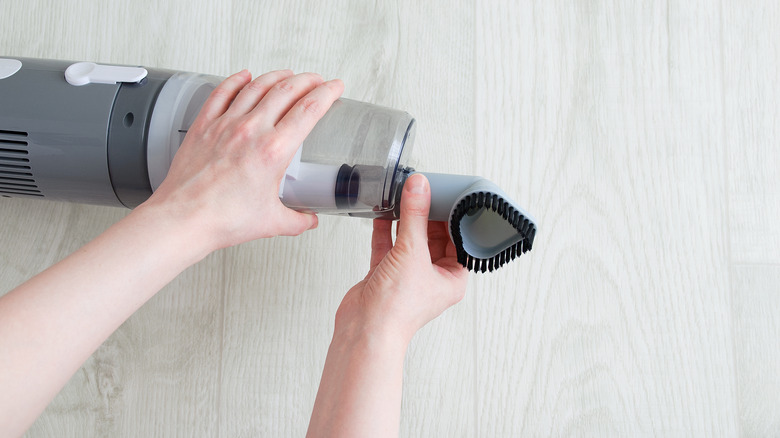
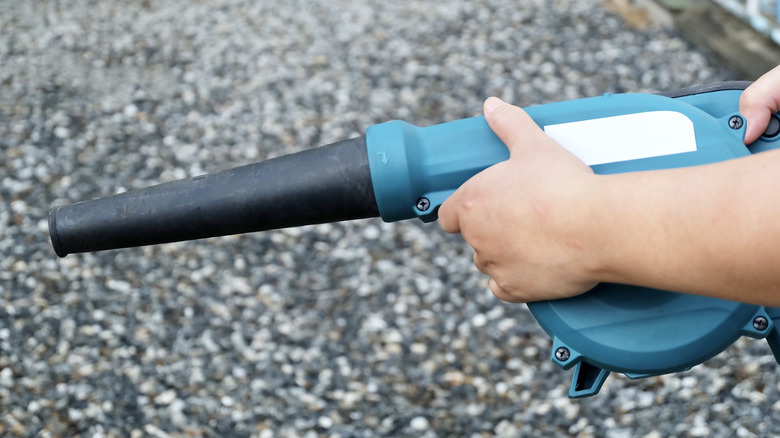
Before starting the cleaning process, you must collect all the necessary supplies to complete the job. Consider your current situation carefully to ensure you can successfully carry out every step. In short, think about how extensive this project is going to be. If you're doing a simple cleaning job, gather multiple towels or sponges, liquid soap, a bucket, a spray bottle, and a garden hose for the main job. You'll also need a vacuum or blower with brush attachments. If you want to do a thorough cleaning job, you should get all the above items and a brush to help scrub areas with thicker buildup. Grillbot recommends using a nylon, brass, or stainless steel brush since the wires are good for sweeping porous materials.
The pieces will require significantly more investment if your wrought iron items are afflicted with peeling paint and a fine layer of rust. You'll need a wire brush, paint scraper, sandpaper, and safety equipment. Since you'll be removing old paint and corrosion, it's highly recommended that you don safety goggles, a dust mask, and gloves to protect your body (via True Value).
It may not be necessary, but if you want to save yourself a trip to the hardware store later, there are a few more items to add. You can pick up specialized formulas for removing buildup, such as rust dissolver. If it's been a while since you last cleaned or your furniture has had a rough year, the layers may be more difficult to remove and require this chemical aid.
Step 2: Set up a clean workspace
You may feel tempted to jump right in and start cleaning your furniture, but before you begin, you need to ensure the conditions are right to start your project. Check the weather report and ensure there's no risk of rain interrupting your deep clean. Even if your wrought iron set is indoors, True Value recommends moving your items outdoors for the cleaning process. This ensures you can thoroughly clean the pieces without risking water damage inside your home. However, it means that even indoor furniture owners need to consider mother nature before taking on this project.
Wherever you set up your workspace, Overstock advises choosing a spot away from dirt. During certain steps, you'll use a hose, and being too close to dirt or grass could cause it to splash back onto your furniture, making your efforts futile. You may need to move some items around, but the best workspace would be in the center of a porch or driveway.
Step 3: Disassemble and detach furniture pieces
Wrought iron furniture suits so many styles of interior design because it is easily accessorized with upholstery, pillows, and other features. If these additional items are detachable, remove them and put them in a safe place before you begin. If you cannot remove them, Overstock recommends consulting your furniture manufacturer's manual for proper instructions for cleaning around these features. If you no longer have a physical copy of this manual, you can easily find these documents online via your furniture maker's company website. You should also remove all decorative pieces.
If you want family members and house guests to appreciate your wrought iron cleaning job, you should also find instructions for cleaning the cushions. No one wants to spend hours doing an extensive cleaning job to put dirty upholstery over their hard work.
When considering the other pieces of your wrought iron furniture, you should remember that the following instructions are for solely cleaning wrought iron. Certain cleaners and chemicals may have different effects on alternate types of materials. If your furniture is a blend of different metals or wood, there may be other effective methods for removing their grime.
Step 4: Remove the first layer of grime
Despite all the advantages of wrought iron material, it does have one shortcoming — the coarse texture is susceptible to dirt and dust buildup. This buildup easily gathers in the etched designs that often accompany wrought iron furniture. Luckily, because dust tends to be dry, it's easy to remove with the right supplies.
Hellamaid recommends removing this first layer with a vacuum or blower. A brush attachment will come in handy on either of these devices, allowing you to reach difficult corners in your furniture. This brush may be necessary if your furniture set is decorated with intricate patterns since dust can compact in the minuscule edgework. Many vacuums have a selection of brush attachments to choose from, allowing you to pick an option best suited for rough-textured metals like wrought iron (via Consumer Reports). If you purchased a specialized brush as recommended in the first step, don't forget to utilize it at this time.
Step 5: Craft a gentle cleaning solution
Now that the dry, loose dirt is removed, you can concern yourself with the more resistant layer of grime. It's recommended that you use or create a mild cleanser, for the safety of both yourself and the environment, as per EPA. Hazardous cleaning products can cause skin and eye irritation, and seep into your surrounding property, harming the wildlife and plants. Stair Supplies insists that you avoid using harsh sprays and cleansers for the good of your furniture too. These products leave residue behind and can slowly break down the metal over time.
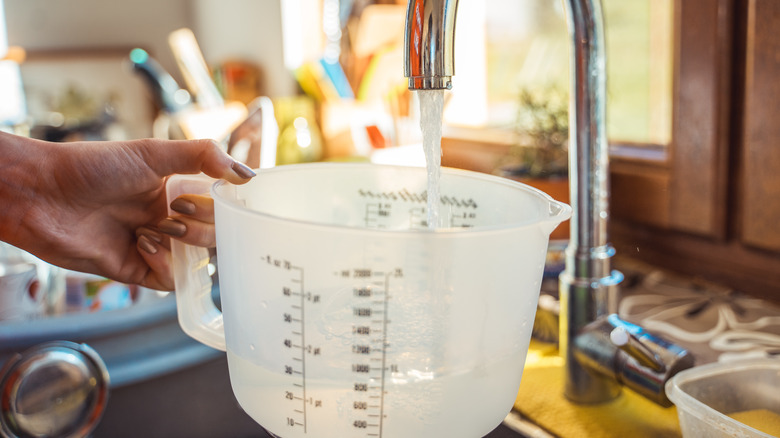
To avoid this situation, use an eco-friendly soap that works. Prestige Wrought Iron recommends using hand soap, dish detergent, or vinegar, advising you to dilute these three solutions by mixing them with water. Just make sure your soap is not an antibacterial variety, which can damage metal furniture. Use 1 tablespoon of liquid soap or 1/4 cup of white distilled vinegar with every 32 ounces of water. If you opt for a gentle premade household cleanser, use 2 tablespoons for every 32 ounces of water. You can place your cleaning solution in a bucket or spray bottle, whichever you find more efficient and meticulous for the next step.
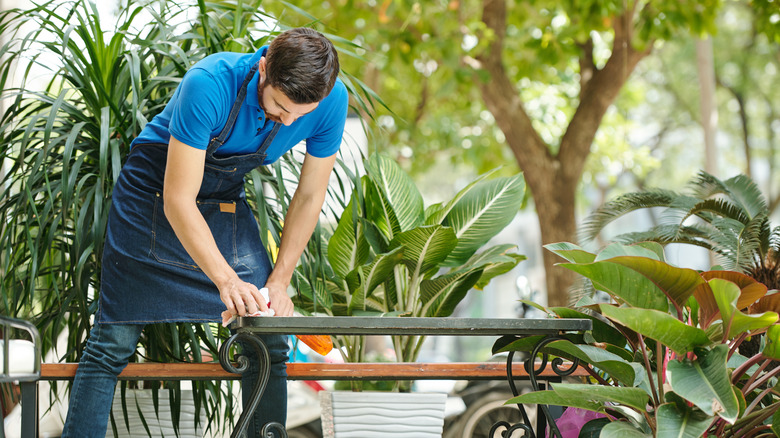
Step 6: Wash the wrought iron
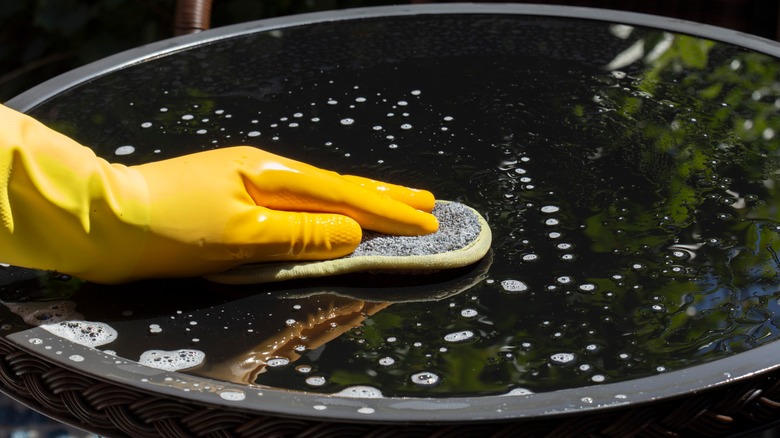
Every previous step has led up to this most important point — scrubbing the wrought iron metal clean. This step requires your homemade or purchased cleaning solution mixed with warm water, a clean towel, a sponge, or a cleaning brush. Prestige Wrought Iron advises wiping down the metal arms, legs, and surfaces of your furniture using circular motions and working top to bottom. You want to work in this manner to keep dislodged debris from falling onto places you've already cleaned, and you should remember this method when cleaning other furniture aside from wrought iron.
If you encounter any areas you can't scour clean, Mighty Covers suggests lightly rubbing a fine to medium-grit sandpaper against the residue. Just be careful not to rub too hard and scratch away your wrought iron's surface, unless you intend to repaint and seal it in a more extensive cleaning process. Don't worry about any soapy residue you leave in your wake as you work down your furniture, for you'll be rinsing your wrought iron clear of bubbles in the next step.
Step 7: Rinse away the soap suds
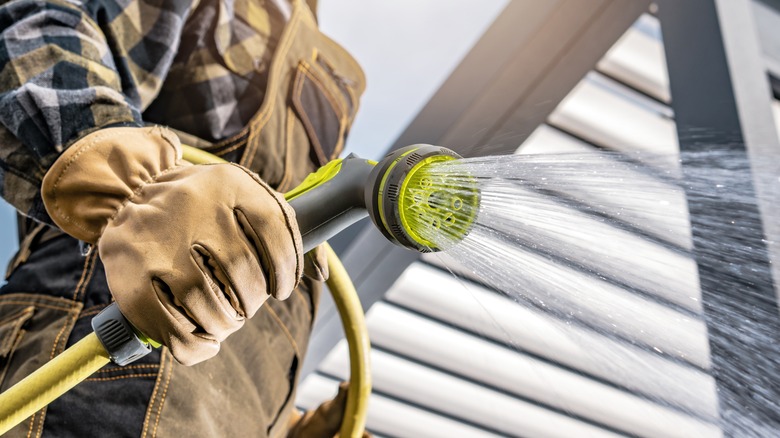
After your items have been soaped up and scrubbed clean, you'll need to hose away any remaining cleanser. The most efficient way to do this is to use a garden hose to spray down your furniture. However, if you don't have access to a garden hose or want more control over how much water you're using, you can use a bucket of clean water, as per How to Clean Stuff. Either hose or dump buckets on your furniture until the water runs clear of bubbles.
If you're cleaning your item indoors despite being advised to perform this project outside, you should use a clean towel or sponge soaked in warm water to rinse your furniture. You'll know you've fully rinsed your item when you wring out your towel or sponge, and clear water drips out (via Prestige Wrought Iron). If water spots appear on the iron surface, this is a sign you're using hard water. This is water that is high in mineral content, and the white spots are deposits of calcium and magnesium. You can remove these spots using a jug of distilled water and another clean towel or sponge.
Step 8: Dry off the furniture
This next step is optional; you can either wait for your furniture to air dry or expedite the process by drying it yourself. If your furniture is indoors, Prestige Wrought Iron recommends drying it by hand since you don't want water damage to occur within your home. However, there is no "better" method for approaching outdoor furniture. You can dry off your furniture with another clean towel, but there are more efficient ways to tackle this task. Baltic Iron Doors advises using a leaf blower or hair dryer if you have either of these devices on hand.
If your furniture simply needed a quick clean, you can finish up here or skip to the last step. If this is your final step and your furniture is outdoors, you should know there's no harm in letting your item air dry and calling it a day. Your item is bound to get rained on and face outdoor elements in the future, and there's no need for you to dry it yourself. However, if you intend to do a bit of restoration during this cleaning job or apply a final protective layer of wax, you may want to speed up the drying process so that you can finish sooner rather than later.
Step 9: (If necessary) Remove old paint and rust
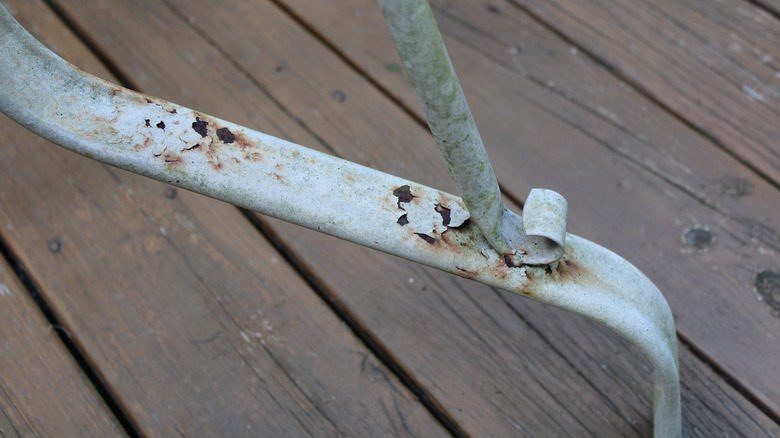
This next step is for wrought iron furniture that's a bit worse for wear. Most wrought iron furniture is coated in a layer of paint, and when this paint starts to chip off, those vulnerable spots start developing rust. If you see signs of either of these occurrences, you'll need to restore your furniture before the problem spreads.
You've already removed the dirt and grime during your deep clean of the item, so now you're ready to remove jagged patches of paint and rust buildup. Before you start chipping away, True Value recommends putting on a dust mask and safety goggles to keep yourself from inhaling uplifted dust and getting these materials in your eyes. You should also wear gloves, long sleeves, and long pants if outdoor temperatures permit it. This is not required, but will keep you from getting chips of rust and paint on your skin.
You can use a wire brush, sandpaper, and paint scraper to scrape down the wrought iron metal. BBQ Guys recommends using medium-grit sandpaper to efficiently file down the surface without overdoing it. When corrosion is especially prevalent, you may need the assistance of chemical formulas to help break down the buildup. True Value advises using a specifically designed rust dissolver, while Prestige Wrought Iron endorses phosphoric acid. Using either of these formulas may require you to wait a full day so they can break down the rust before you can move forward with your project. You should know that if corrosion is bad enough to have put holes in your furniture, you may not want to continue this project. Furniture that reaches this state is better off being entirely replaced or fixed by a professional (via AR Iron).
Step 10: (If necessary) Restore the paint job with a new coat
Once all the rust and unwanted paint is properly cleared off and you have a fresh canvas to work with, it's time to restore your wrought iron furniture to its former glory. You may be tempted to leave your wrought iron bare, but this is highly inadvisable. Leaving your wrought iron unpainted leaves it vulnerable to rust. If you like bare wrought iron, you can skip to the next step and apply a sealant wax, as per Baltic Iron Doors. As a general rule of thumb, it's imperative that you have some form of covering to seal over the bare metal.
If you're ready to paint, try to recall if you received touch-up paint when you purchased your outdoor furniture set. Many furniture companies sell interior and exterior sets with touch-up paint included. Still, if you didn't receive any, you can pick up a similar color from your local hardware or home improvement store.
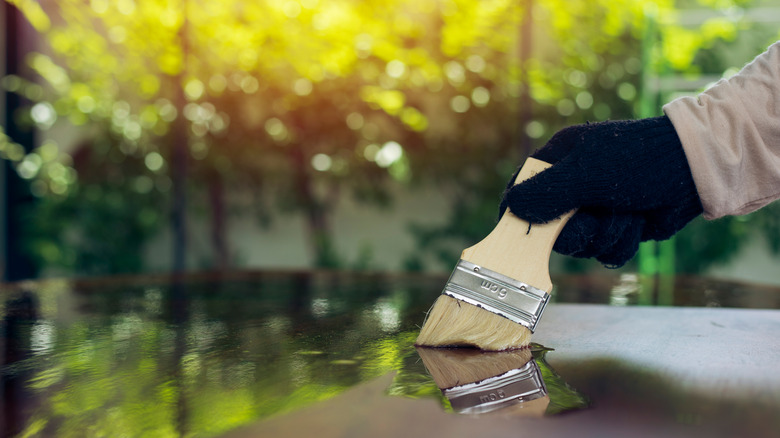
Make sure you purchase outdoor paint, and HomeRight advises using an oil-based formula. Many paints made for metal materials and outdoor projects are labeled as exterior-grade and rust-resistant (via Central Restaurant). You can use spray-on or brush-on paint to apply an even coating over the entire wrought iron surface (via How to Clean Stuff). Afterward, make sure you save any leftover paint. You may need to touch up your furniture again if you plan to keep it for years to come.
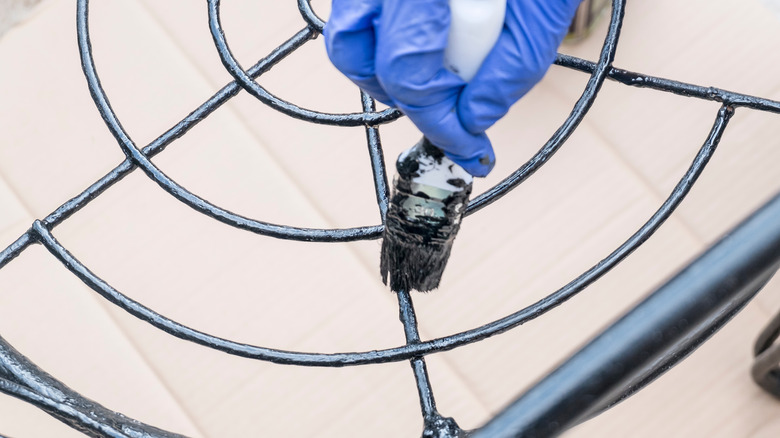
Step 11: Apply a protective wax for the finishing touch
At this point, your wrought iron furniture should be sparkling clean. If you took the time to restore its paint job, your outdoor or indoor set probably looks like new. All that's left to do is seal your project to ensure your hard work lasts. According to Home Depot, you can use rust preventers or car wax to preserve the appearance of your outdoor iron furniture. The only recommendation is not to use a wax that needs to be buffed on or off. This type of wax easily gets on your skin, making it impractical for tables and chairs that you'll be touching regularly. Fintech Abrasives endorses black or aluminum metal polishing compounds to coat wrought iron.
Using this proper sealant over your paint job or bare iron material reduces paint chipping by sealing it under a top coat. This also minimizes future rust buildup by protecting the metal from water and oxygen, which cause corrosion to develop (via Capitol City Ironworks). The sealant also forms a smooth surface over the porous metal, making it less likely to hold onto dust and lengthening the time between cleanings (via Car Roar).