18 Dollar Tree DIYs To Create A Stunning Centerpiece For Any Occasion
The perfect centerpiece can be essential for everything from enjoying everyday casual dinners to more formal events that require a little extra sparkle and glam. While retailer centerpieces can cost a pretty penny, there are easily hundreds of DIY centerpiece ideas to be found online that are great for any occasion. Many can be created using Dollar Tree elements and flowers, which can be a budget-friendly and creative way to decorate your table.
While some involve more complex supplies and engineering, the majority of these DIYs are easy to do even for beginners, and only require a glue gun or other adhesive to make happen. With Dollar Tree's extensive range of florals and related supplies, each DIY can be totally customized to fit your design aesthetic or event theme, all at a price much lower than a custom floral design for things like weddings and special events. Even better, many involve common elements from Dollar Tree like glassware, candlesticks, floral foam, and moss, all of which can be used for many different projects down the line.
1. Towering flowers
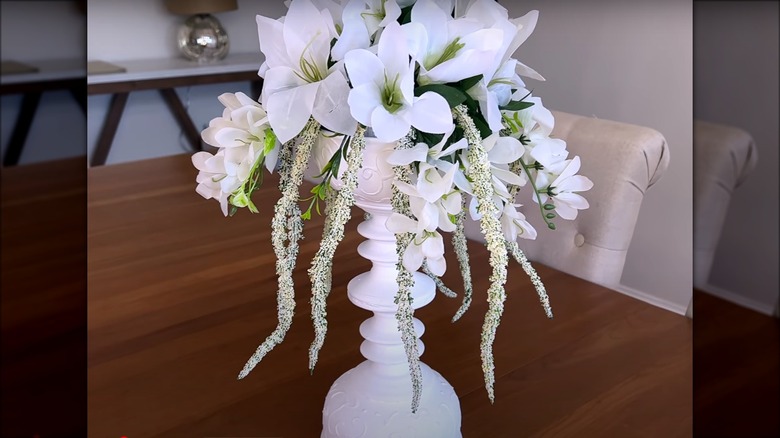
When you need a little extra height for your centerpiece, you can create a perfect tower with a couple of Dollar Tree pedestal candle holders with two heavy stoneware bowls at the top and base. Add some texture to the bowls by using puffy fabric paint to create a design before you paint the entirety a solid color (in this example, the DIYer uses white, but gold, silver, or black would also look stunning.) When you've created your tower, simply add a block of floral foam inside the top bowl and add flowers.
2. Floral garden box
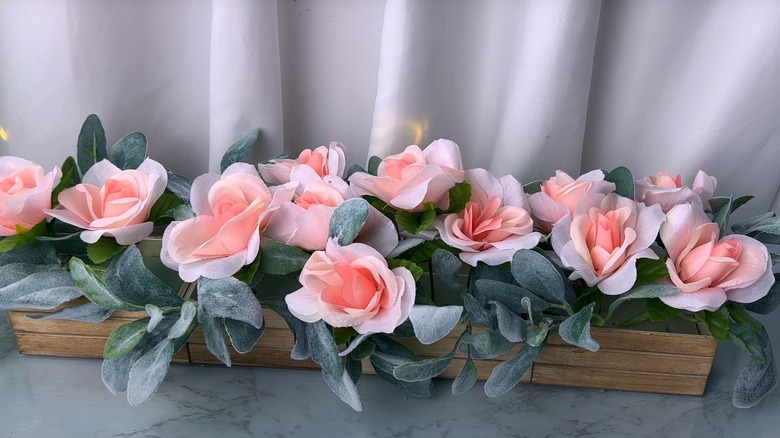
One of Dollar Tree's more popular items among DIYers are these small wood crates, which can be used for everything from storage to decor. Use 3-4 crates to create an adorable and simple horizontally-oriented centerpiece by gluing them together with some hot glue. Then add a rectangular block of floral foam in each box, using it as a base for flowers and greenery. Leave the crates bare for a lighter finish, or add some stain or wax to bring out even more beauty in the wood.
3. Glass cylinder tableau
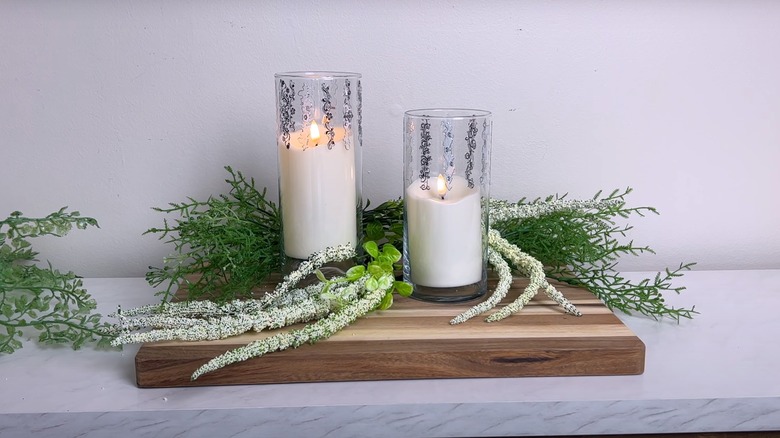
This easy-to-assemble DIY centerpiece using Dollar Tree items is very simple in design and elegance. Using a wood cutting board as the base, add two glass cylinder vases, which come in a couple of different sizes. To add some texture, use some decorative metallic stickers along the top and fill them with real pillar candles or LED lights. Use greenery and florals to fill in around the base of the candles. Because this one doesn't involve adhesive, you can quickly change out the look according to the season or event just by adding different flowers or stickers.
4. Flower bucket trio
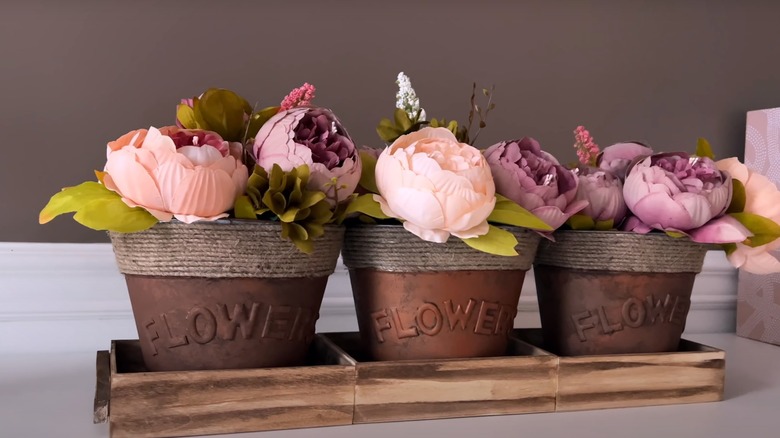
Use three of Dollar Tree's wooden trays to create a larger, longer tray perfectly sized for these adorable flower buckets. You can make the containers by adding some paint to these galvanized metal buckets, which already have twine accents around the top. Add paint and some large puffy stickers to decorate the buckets before squeezing them into an oblong shape to place them into the tray. Fill them with large summer blooms. If you do not want the cut-outs on the end of the trays to be visible, place these wooden game pieces on the ends with some glue to create handles. Keep this centerpiece on your dining room table all summer long.
5. Large floral ring centerpiece
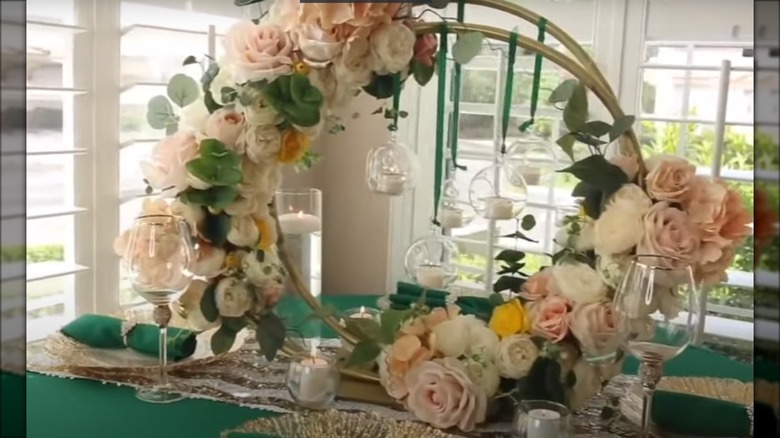
This circular centerpiece is large, making it perfect for a special occasion like a wedding, or for a dynamic, sculptural piece on an entryway table or fireplace mantel. Use two plastic hula hoops to form the rings, which you can attach to a wood cutting board with a single screw. Paint the hoops your desired shade, then brace them together so they stand upright with wire or zip ties. Place a foam pool noodle around segments of the hoops where you want flowers. To add blooms and greenery, use glue or just stick floral picks directly into the foam.
6. Sparkling goblets
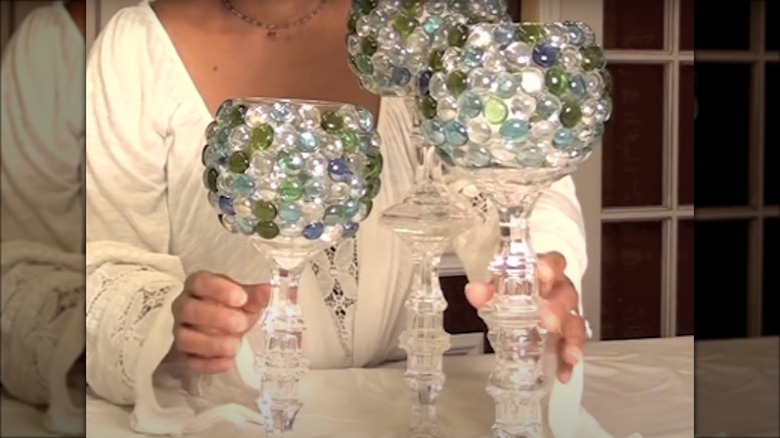
If you're looking for a lot of sparkle, opt for this easy trio of glass goblets that are perfect for the center of your table. Create the base by hot gluing two to four glass candlesticks together. At the top, add a small glass bowl to hold a votive candle or LED light. To add some color and shimmer, cover the outside of the bowl with glass accent gems applied with glue in rows. Make a trio using different numbers of candlesticks on the base. You can also paint the glass solid first for a fun variation, or use crystals instead of gems.
7. Glass lantern or greenhouse
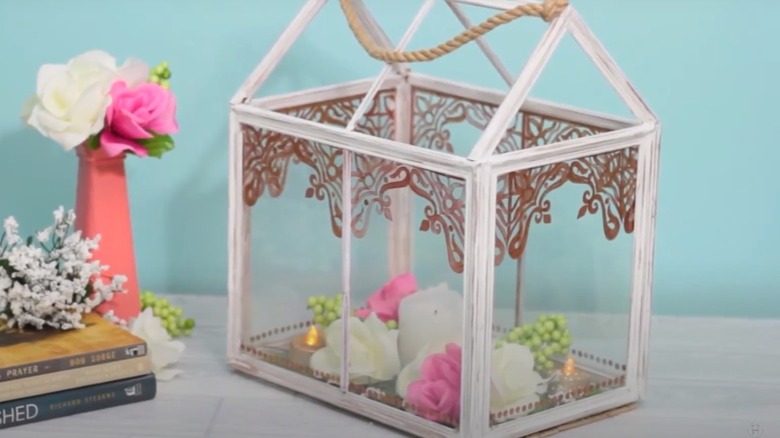
Using several Dollar Tree wooden picture frames, you can create a wide lantern or DIY mini greenhouse by affixing the frames together with hot glue in the shape of a cube or rectangle. This enclosure makes a perfect centerpiece for a larger table, which can accommodate small plants, florals, and candles inside for a fun cottage look. It also makes an adorable terrarium centerpiece that you can fill with real or faux succulents. For flowers, add a floral foam block in the middle and stick in blossoms and greenery until its as full as you desire.
8. Floral topiaries
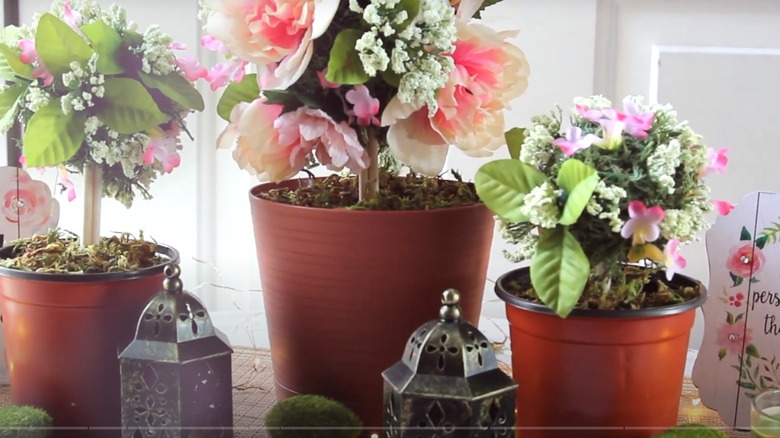
These floral centerpieces offer both height and lushness, making them great for both wedding receptions or everyday occasions. To create, place a block of floral foam inside a mid-sized container like these painted planters. Create the topiary using three wood dowels glued together and a foam sphere at the top. Cover both the white foam and green floral foam with reindeer moss and some glue before adding flowers directly into the sphere. You can vary the size of both your planter and the foam balls to create topiaries in various sizes.
9. Tabletop cloches
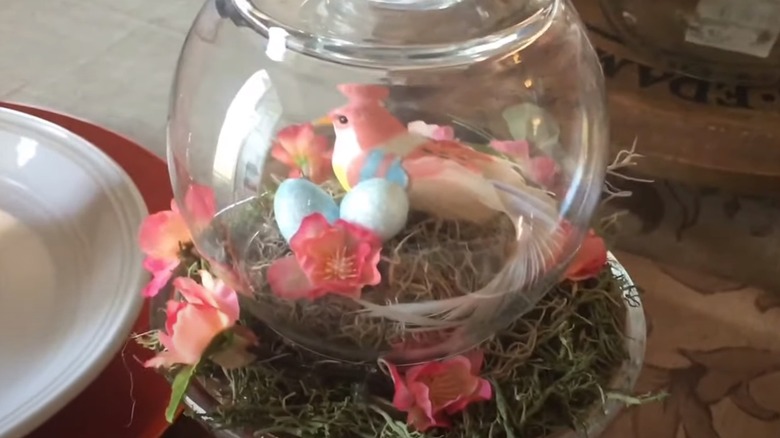
Cloches always make cute centerpieces, whatever their size and contents. To create a simple cloche, hot glue a glass candlestick to a flat pillar candle holder. Once you have your base, fill it with moss, florals, or other accents like butterflies and birds. To finish it off, add a glass bowl or other piece of glassware to the top of the base. You can even create a handle from the top of one of Dollar Tree's 3-ounce candles by removing the cover and gluing it to the top of the overturned jar or bowl. Use several for a fun tablescape assemblage with votive candles.
10. Funky flamingo arrangement
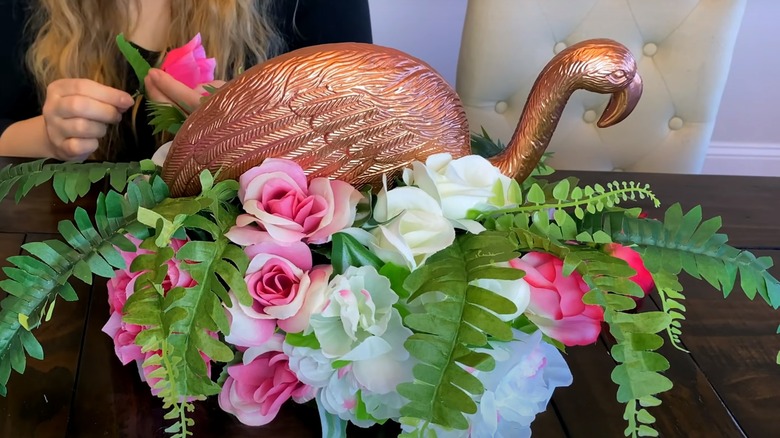
For a perfect summertime centerpiece, cut down the wire legs of a plastic flamingo and add it to your arrangement. Use a wooden cutting board or charger plate as your base, adding a block of floral foam to form the arrangement in. Paint your flamingo in a desired shade (seen here in a luxe rose gold) or leave it in its original shocking pink, then stick it in amongst the flowers and greenery, using some hot glue on the legs to keep it steady. This makes a great centerpiece for a backyard summertime barbecue or luau.
11. Colored glass circular arrangement
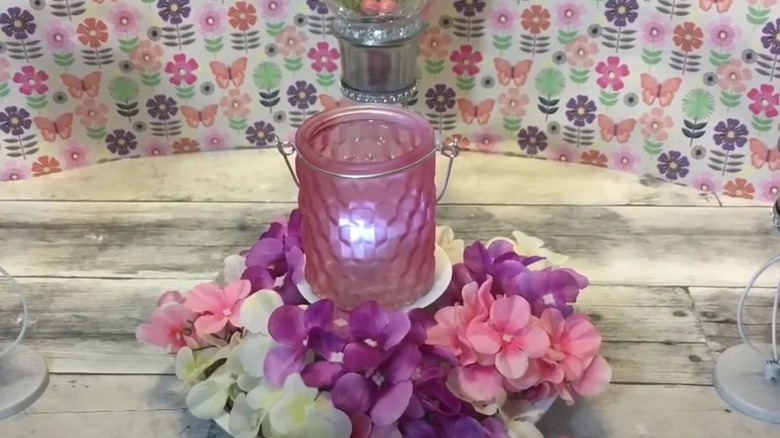
This beautiful circular centerpiece uses a metal pie tin base. Add a pillar candle holder glued down in the center, which will give you an upper tier that you can place a glass votive holder on top of. Fill the bottom of the pie tin with small florals, moss, or glass pebbles in colors that complement the votive holder. This DIY's more minimal size and low height make this perfect for smaller tables. Or, use several placed at intervals down a longer table intermixed with lower votive holders.
12. Metal bucket arrangement

Another simple DIY, all you will need to create a floral bucket arrangement is a small tin pail, some puffy paint, and a block of floral foam. Use the paint to create decorative accents on the container before painting it all one shade. Great options include gold, silver, white, or black. Place the foam inside the pail and add flowers until its as full as you desire. This lush and low arrangement is great for special events or everyday where you want to be able to see easily across the table.
13. Floral candle wreath
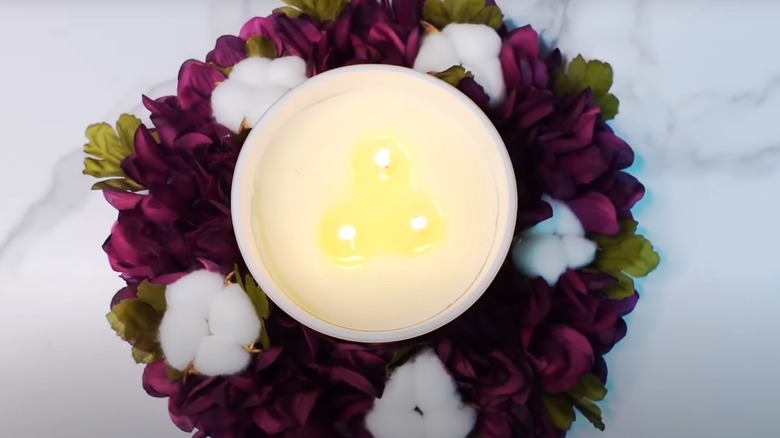
This DIY is another great smaller arrangement that you can scale up or down in size according to your needs. Start with a wire wreath form, which you will wrap in burlap ribbon until fully covered and secured with hot glue. Add flowers to the mesh of the burlap by weaving them into the material or gluing them down. At the end, you will have a small custom wreath that you can place around your favorite candle. For larger candles, you can also use a foam wreath form to stick flowers and greenery into.
14. Wooden votive holder
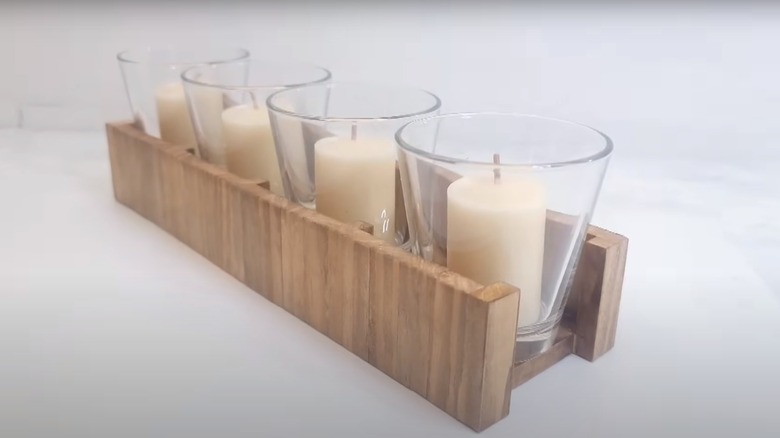
If you want to avoid florals and are looking for a stylish sleek and simple centerpiece, this wood DIY votive holder may be a perfect solution. To create the base, use the pieces from a wooden tower game to construct a rectangular enclosure by gluing the pieces together to form a bottom and sides. Add a 4-pack of glass votive holders in the middle for warm and cozy glow the length of any table. This is a great centerpiece for those with more minimal and contemporary decorating style.
15. Floating candles
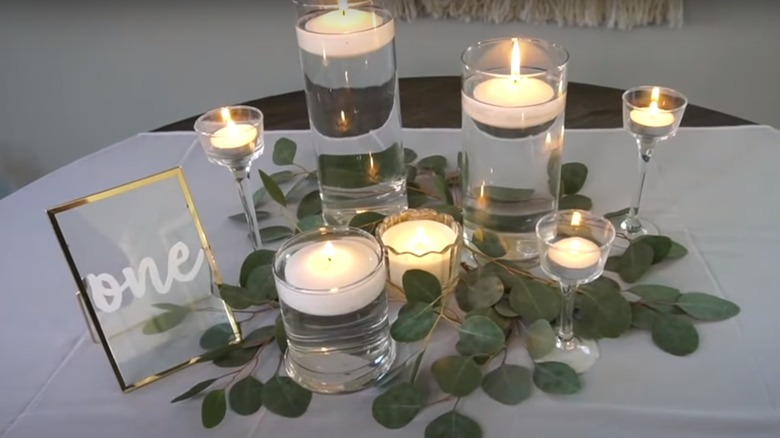
Perhaps the simplest DIY centerpiece on this list, this one uses assorted glass cylinders and other glassware to form a tableau of varying heights. Just add floating candles to each container and a few sprigs of greenery or florals under and around the glass pieces. The greater the mix of glassware, the more unique and varied your centerpiece will be. This is a great simple alternative to more elaborate arrangements that doesn't take up as much horizontal or vertical space. Use colored gems, pearls, or stones in the bottoms of the glasses for some extra texture.
16. Basket of blooms
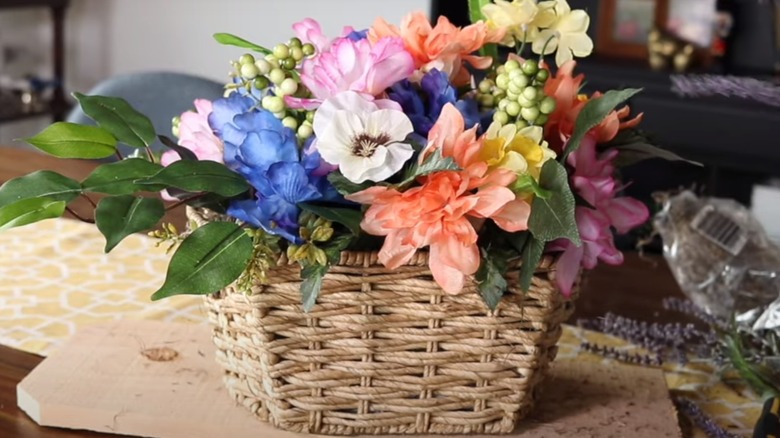
Another simple classic, this DIY uses a woven basket as a container, adding moss, floral foam, and abundant flowers and greenery to make a full and lush arrangement of blooms. You can also add other accents, like decorative ribbon tied around the basket. This one is easy to swap out the contents of during different seasons and can be customized using Dollar Tree's vast selection of faux flowers. Woven basket options are also diverse, including round, oval, or rectangular baskets in a number of styles. For some extra weight to avoid tipping or blowing over, add some pebbles to the inside of the basket. Use various flowers in spring and summer, then swap them out for fall foliage and pumpkin picks as a cute way to decorate your outdoor table for autumn.
17. Painted jar arrangement
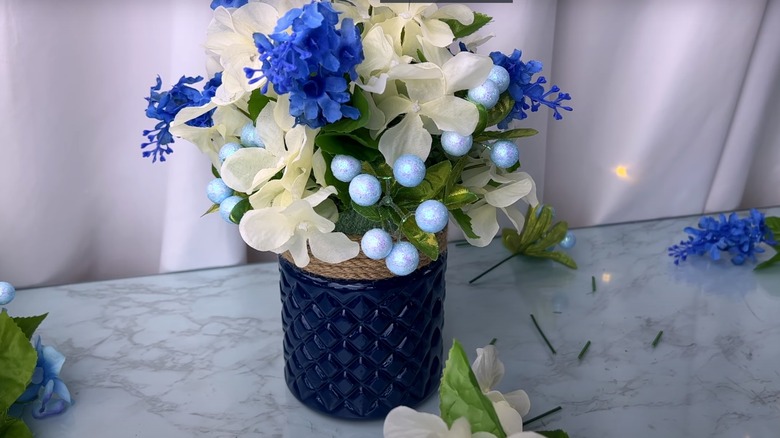
Dollar Tree has a great selection of glass jars that come in various shapes and sizes, including etched glass and straight-sided containers. To turn one into a stylish and simple DIY centerpiece, add some paint on the exterior in your desired shade. Remove the lid and attach a floral foam disc to the top with some hot glue. To disguise the seam between the glass and foam, add a rope or twine wrapped around the top several times and secured with glue at the ends. Stick florals and greenery directly into the foam along the top for a chic arrangement.
18. Floral balls
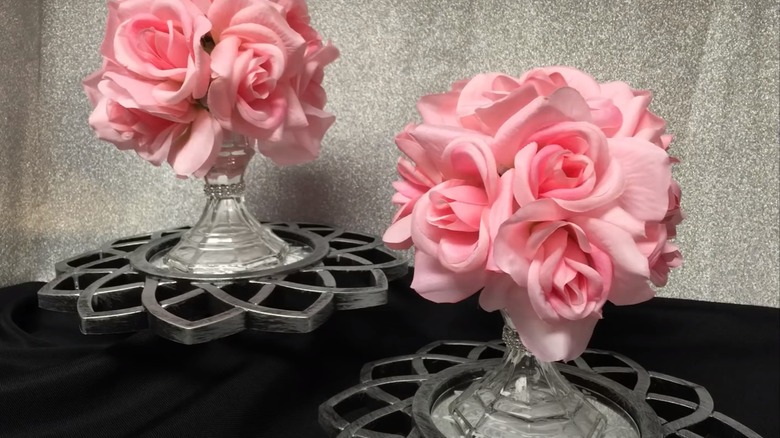
This simple DIY is great for creating smaller and simpler arrangements shaped like a sphere. Use a small decorative mirror as a base for a glass candlestick attached with some glue. To the top, glue a styrofoam crafting ball. This surface will allow you to adhere blooms around the entire perimeter, forming a tight ball of flowers. This DIY looks especially stunning with roses, mums, peonies, and other full-bloom flowers that add volume. Use them alone or in groupings with other candles and vases for a larger tablescape.