12 Ways To Turn Dollar Tree's Paper Doilies Into Stunning Home Decor
We may receive a commission on purchases made from links.
White paper doilies might bring to mind elementary school crafts or cheap covers for cookie trays, but these inexpensive Dollar Tree finds can be transformed into several super cute decor pieces for your home. Try your hand at a DIY doily bunting to celebrate a special occasion, or decoupage doilies onto a cutting board for a custom design. Doily-decorated candleholders and string lights add a cozy glow to your home. And many of the doily craft ideas are customizable, so you can add your own embellishments to make them truly yours.
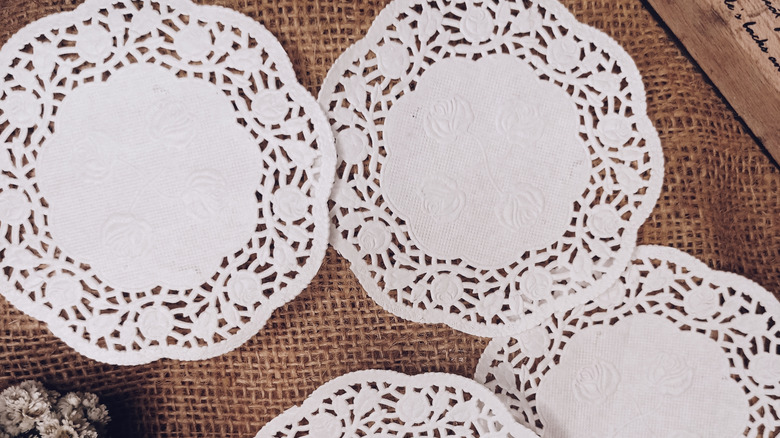
Just because you want to decorate your home on a budget, it doesn't mean you have to forgo frills and flourishes. That's why Dollar Tree is the perfect place to start for craft supplies, and the paper doilies are no exception. They come in a large pack, which means you'll have plenty to try all of our doily home decor ideas. To stock up on paper doilies, head to the plate section or the party section of your local Dollar Tree. You can grab a 32-count pack of Caterer's Corner 8-inch round doilies or the 32-count multipack paper doilies with four sizes: 6, 8, 10, and 12 inches. Either way, you're ready to make wreaths, flowers, wall art, and more with the lace-like paper shapes.
Wrap a mason jar with doilies for a rustic vase

If you love to decorate your home with flowers, you always need vases. This DIY vase uses mason jars, adorned with paper doilies (or use Dollar Tree's Floral Garden cylinder vase). Put one doily on each side of the jar, holding them in place with dots of hot glue. Use a piece of twine, ribbon, or string to tie the doilies together where the edges meet. Or, use decoupage glue to adhere doilies to the jar, overlapping different-sized doilies. Add flowers, or use it as a luminary with battery-powered candles inside.
Decoupage doilies onto a cutting board to create a custom display
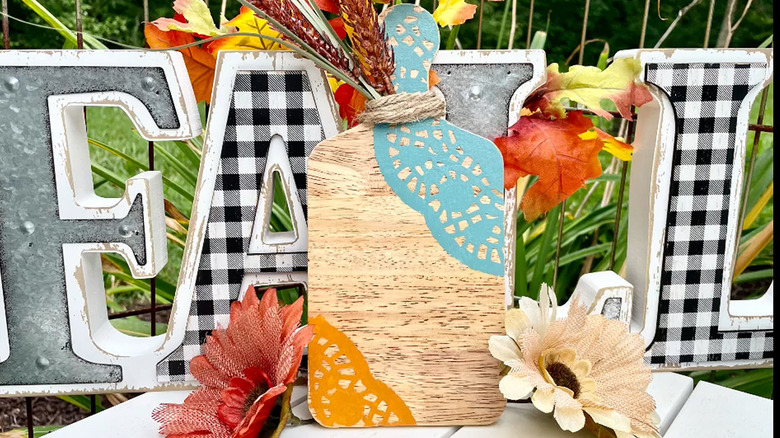
For this project, you'll need a wooden cutting board. The Cooking Concepts cutting board is a popular option that many crafters use for chic Dollar Tree DIYs you can create using a cutting board. Or, repurpose a wood cutting board you already have. Spread Mod Podge on the wood, and glue sections of paper doilies onto it. Go over the doily with more Mod Podge. To change the colors, stain the board, or paint the doilies. You can also customize it into the perfect centerpiece by tying a bow or twine around the board and tucking in florals, also easily found at Dollar Tree.
Adorn your door with a doily wreath
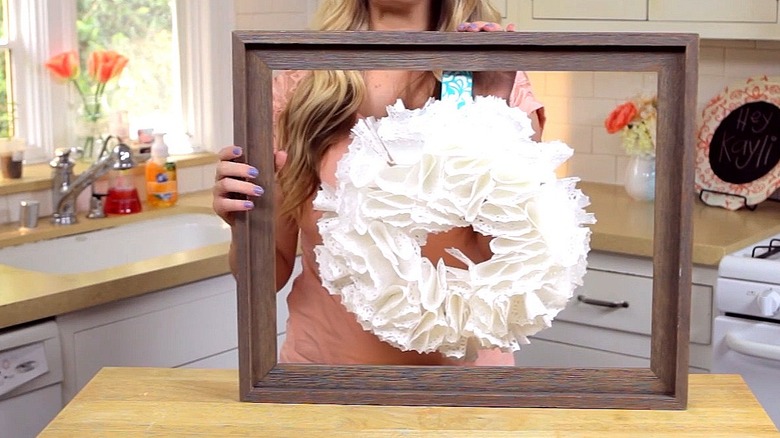
Start with a foam wreath form to hold folded doilies to create a neutral, year-round wreath. Fold each one in half. Then fold one corner over about a third of the way, and alternate folding back and forth, accordion style, to make three folds. You should end up with a triangle shape that fans out to make a zigzag pattern. A little hot glue holds it together. Then, hot glue the folded doilies onto the wreath form close together until it's covered. Add a ribbon for hanging and bows or other accents. These wreaths are so cheap to make that a new one with decor for each season is totally doable.
Hang a doily bunting to fit a theme
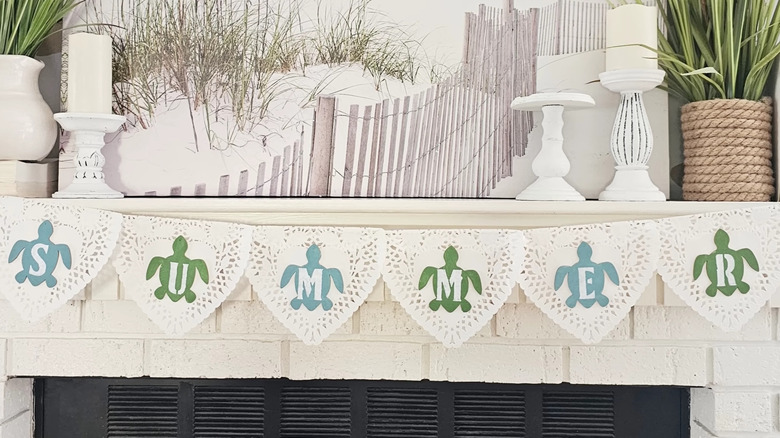
To customize a doily banner, fold doilies about an inch along one edge. Place the doilies on a string or ribbon along the fold, using hot glue to hold each doily to itself. You can overlap the doilies or leave gaps between them. Now, decorate them however you want. Cut out letters to spell a special message or your child's name, and hang the banner on their bedroom wall. Or add other design elements, like pompoms or bows, between the doilies. Heart-shaped doilies create pointed sections while circle doilies offer a scalloped look.
Add a glow with a doily tea light candle holder

Showcase something like the Luminessence LED tealight candles in doily candleholders. Center a small doily over a small upside-down jar that's slightly wider than the candles. Push the edges of the doily down around the jar. Apply glue from a glue stick on the middle, and layer another doily on it. Repeat with a third doily (or more if you want it fluffier). Tie a piece of string around the doilies while they're on the jar to hold the shape. Slip them off the jar, turn them over, and put in a candle. Mix it up by placing several different-sized pillar candles on a tray for an elegant centerpiece.
Upgrade a strand of lights with doily bulb covers

Looking for creative ways to repurpose string lights? These round doily light covers are simple to make. Fold four small doilies in half, and glue them together along the fold, stacking them directly on top of one another. Then, bring the two outer halves together to form a sphere, and glue the outer edges together. Continue gluing pairs together until you have a circle with four pairs sticking out. Now, you just need to slip a doily sphere onto each bulb to make them glow. Dye the doilies first by soaking them in RIT dye diluted in a bowl of water, or using watercolor paints to add some color.
Craft a bouquet of paper doily flowers
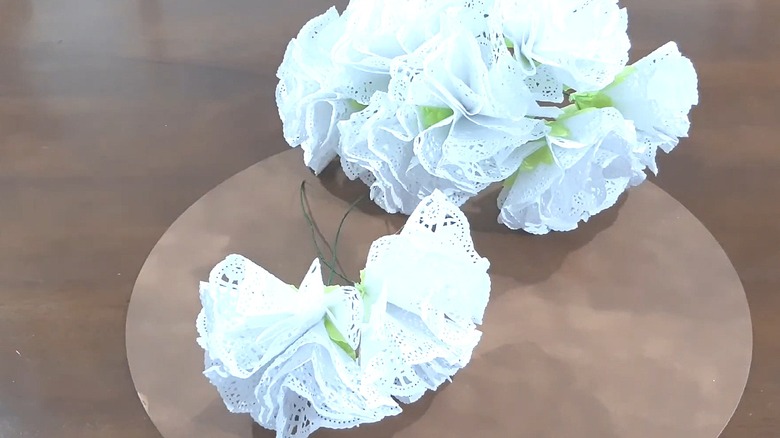
Transform paper doilies from the Dollar Tree into the sweetest home decor with these flowers. Fold each doily in half four times to create a small triangle shape — you need at least three doilies per flower. Then, open each one up, but bunch it with the center point down to create a petal-like bunch. Hot glue three bunched doilies together in a circular flower shape. If you want a larger flower, you can add more. Customization options include painting the edges of the doilies with watercolors to give the gradient effect of an iris or lily.
Design a textured wall canvas piece
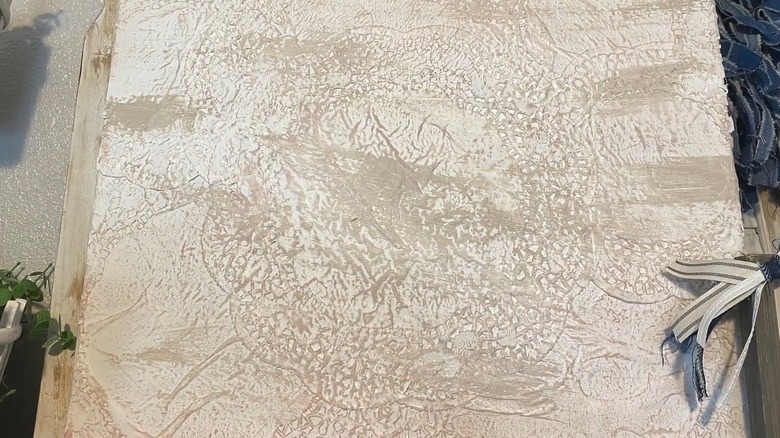
There are many ways to incorporate abstract art in your home — and one easy method is creating it using paper doilies for texture. Use a Crafter's Square 8-inc by 10-inch canvas (or pick up a bigger canvas at your local Michaels or independent craft store). Spread Mod Podge over the canvas, and layer on doilies. Any design is fine — overlap and cover all of the canvas, or leave some spots bare. Scrunched doilies are fine, too — they add texture. Decoupage over all of the doilies, and lightly brush paint over as well, if desired. You can also add over three-dimensional objects or accents like these flatback imitation pearls.
Make paper doily baubles
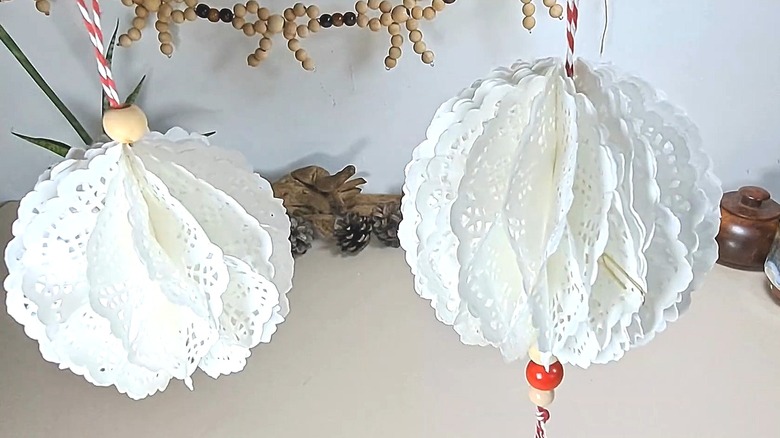
These round doily decorations start with 10 small paper doilies, folded in half. Then, unfold and run a thin vertical line of glue from the fold to top edge and refold to glue it together. Repeat for every doily. Then, add two vertical glue lines on the outside of a folded, glued doily about ¼ of the way from the edge on both ends. Stack another folded doily on top and repeat with all of them, forming a half-circle stack. Once it's dry, open it up, and connect the two outer sides to form the sphere. You can stack them on a table for a snowball-like display or hang them like lanterns from baker's string.
Display dried florals in a kraft paper and doily cone
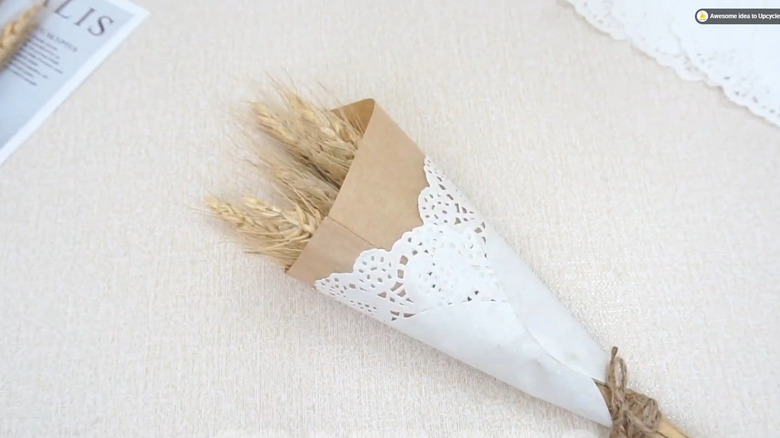
Dry and style your favorite flowers (or grasses) with this doily idea. Cut the lacy edge off of ⅓ of a paper doily, and roll it to make a cone shape, with the remaining lacy edge at the top. A little glue or piece of tape on the inside holds the cone shape. Then, wrap a slightly larger piece of brown paper into a cone — it should stick up above the doily slightly. Now, it's ready for your favorite dried florals or garden herbs to go inside (with or without a bow to finish the look).
Decorate the front of a photo album or journal
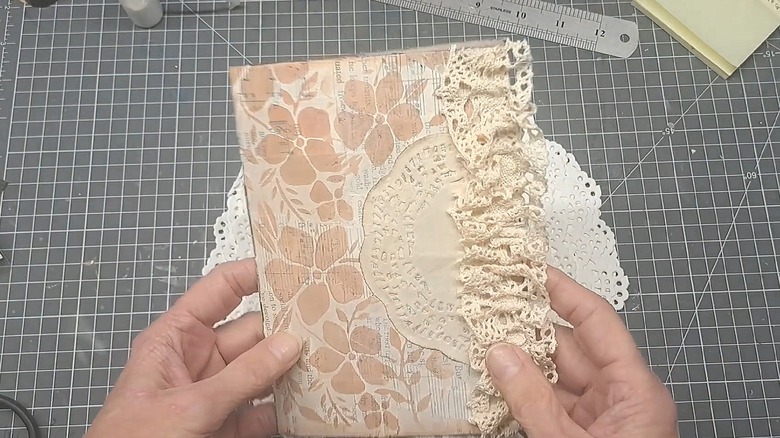
Want more stylish ways to add personality to your home with family photos? A scrapbook or photo album displayed on a coffee table is a classic option, but it's even better when you customize the cover with a collage-style design. Paper doilies are easy to decoupage onto an album cover, creating a layered, lace-like look. It's also a versatile decoration idea — use a single, whole doily, or cut several small sections. You can also use the doilies inside your scrapbook or junk journal as backgrounds or photo frames.
Design lacy envelopes to accent decor or use in artwork
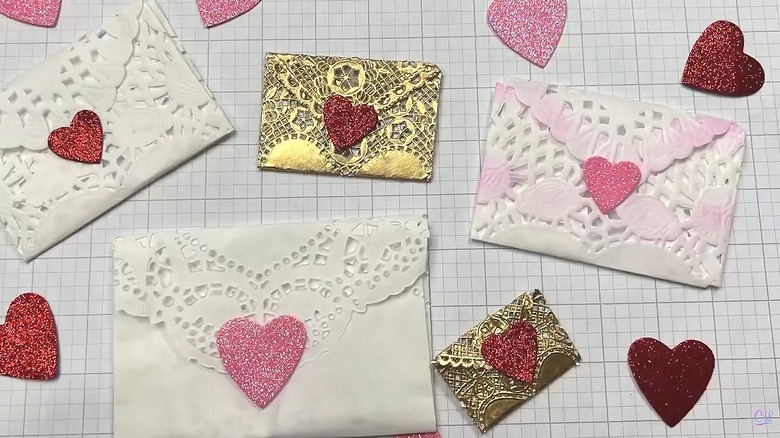
Spread love with lacy envelopes. For heart-shaped doilies, fold in the curved edges to form straight envelope sides. Fold the heart top over for the bottom edge of the envelope. The point of the heart folds over for the flap. Or, fold a round doily in half, open it, and fold the bottom edge to the fold line, creasing it. Fold the new bottom edge up on the center fold line, and bring both sides in to make straight envelope sides. The top edge is folded down for the flap. Add some vintage charm to your lace envelope with a custom wax seal using a kit like the Crawell wax stamp kit.