How To Decorate Your Walls Without Using Framed Art
Whether you're a minimalist or maximalist, a lover of neutral tones or rainbow hues, decorating your home is pretty much a non-negotiable. Why? Because, as The Turquoise Home points out, your decorations have an effect beyond just what you see, but also on your mood, creativity, comfortable level, and so much more. Your decor choices matter.
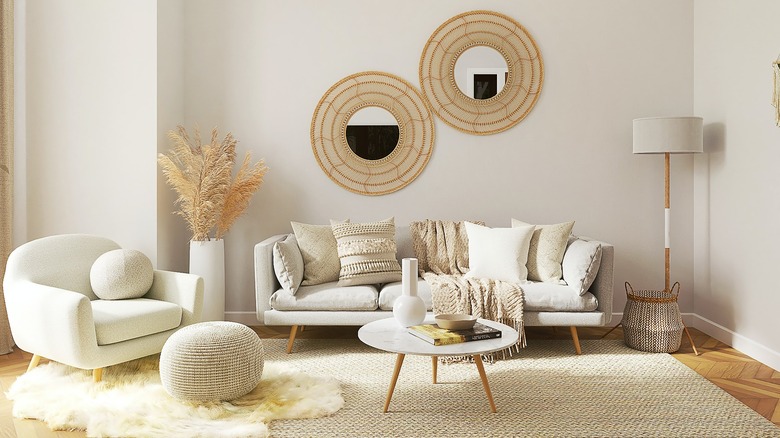
You can decorate your home in all sorts of ways — from your furniture to your bedding — but your walls are one of the easiest (and most essential) areas to add some style. Even though we tend to associate wall decor with framed art, you are far from limited to using just that. From plant walls to easy murals even the least artistic of people can pull off, wall decor is much more versatile than you think. Check out some of our favorite ways to decorate your walls without even touching a single picture frame.
Turn to nature
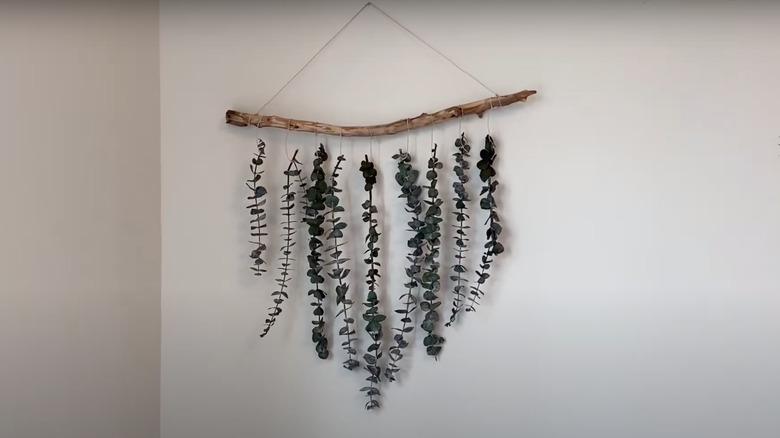
When in doubt about how to decorate your walls, turn to nature. Not only does it bring an earthy, grounded vibe into your home, but it's also a pretty inexpensive option, especially if you source all the materials yourself. Using natural elements like branches and leaves also allows for much customization. You can get as creative and crafty as you want, whether you just hang a cool branch on your wall, or DIY a cohesive art piece.
For an easy craft, you can purchase eucalyptus (often available at the grocery store) and use fishing wire to hang it from a branch or piece of driftwood as The Honeycomb Home did. Or, for a more involved art piece, you can cut branches so they form a heart-shape (or whatever shape you want), and then use paint to add a fun pop of color, as seen on Shades of Blue Interiors. Something to note is that depending on the types of materials you use, not every art piece is going to last forever, which is why it's great that this route is very inexpensive.
DIY a mural

You don't have to be a seasoned artist to DIY your own wall mural — you just need to have a game plan before you go all in with the paint. The materials and tools you need are really quite straightforward — paint, brushes, a paint roller and tray, and then whatever you'll be using to mark the wall depending on your design (such as a pencil and tape measurer, or painter's tape).
As Young House Love recommends, mock up your design on paper and take measurements so you'll generally know how to mark your wall. You shouldn't worry about being overly precise since there's a good amount of wiggle room, especially if you're going for a more free-form abstract design. We love the idea of doing wide, flowing diagonal stripes since it's practically foolproof. Just remember, if you're working with multiple colors, you'll need to let each color dry completely before going in with another. To tackle this, Young House Love suggests painting alternating stripes, letting them dry, and then going back to fill in the next set of alternating colors.
Embrace macramé
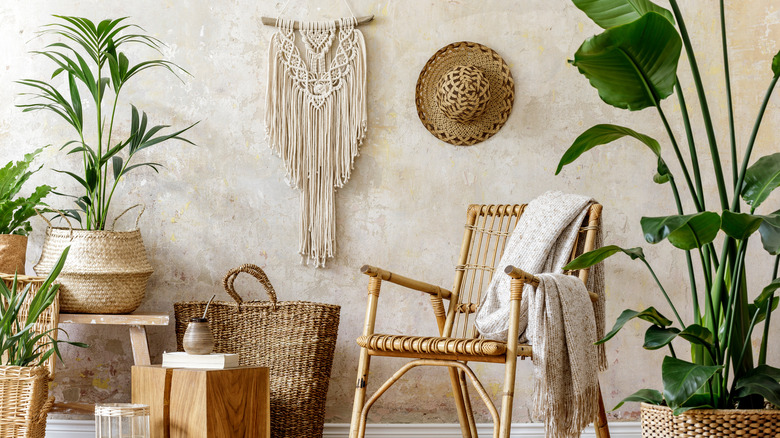
Macramé is a form of textile that's made from knotting materials like yarn or cotton twine. It can be used in everything from jewelry to plant hangers, but it's especially common for wall art. Though it was very popular in the '70s, as My Modern Met reveals, it was actually all the rage in Victorian England, and even Queen Mary herself hosted macramé classes for her fellow royal ladies. British royalty aside, macramé now gives a laid-back, boho look to any room, and it makes for a great large-scale art piece that doesn't take an extreme amount of effort.
Whether you're looking for something large or small, macramé is a solid wall art option. A quick web search will bring up a ton of pieces you can shop, or you can even take on the task of making one yourself. Made by Hand shows an easy beginner-friendly tutorial on how to make a mini macramé wall hanging using just a macramé cord and a small stick or wooden dowel. Feel free to get creative with colors, too!
Make a plant wall
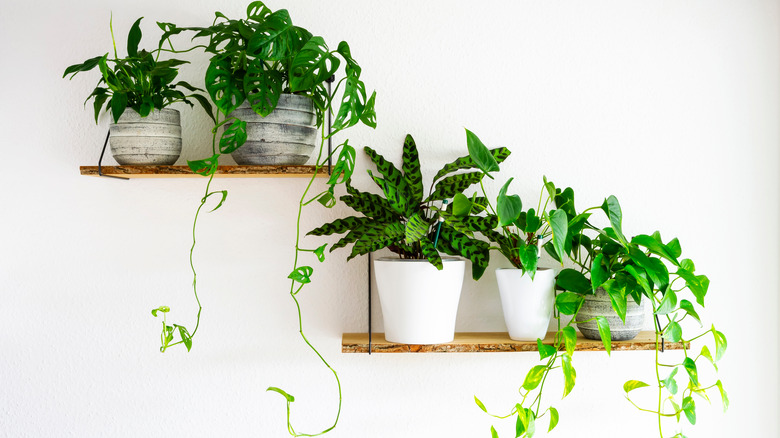
Another great way to bring nature inside is to make your very own indoor plant wall. But before you start filling up your wall with any plant you come across, take some advice about curation from an expert. Cara Anderson, the owner of Plant Roost Design, told MyDomaine some key tips for creating a living wall. First, you have to make sure your wall is suitable.
"If you are not planning to use grow lights, you will need a location with natural lighting via a window or skylight. Bright, indirect light is ideal for most plant walls," explains Anderson. When it comes to the plants themselves, Anderson recommends going low-maintenance and ones that can tolerate not having perfect lighting conditions.
"The best go-to plants for indoor plant walls are pothos, philodendron, dracaena, and anthurium plants," she explains. "These plants are all very hearty and will do well with a little neglect. Ferns look beautiful in plant walls, though they lose leaves quite often and can make quite a mess. It's important to have fun and experiment using different plants, but be sure all the plants you use require the same type of care." In general, a plant wall does require more care than, let's say, a macramé wall hanging. But if you've ever wanted to test out your green thumb, this is a great way to do it.
Stick on some wall decals
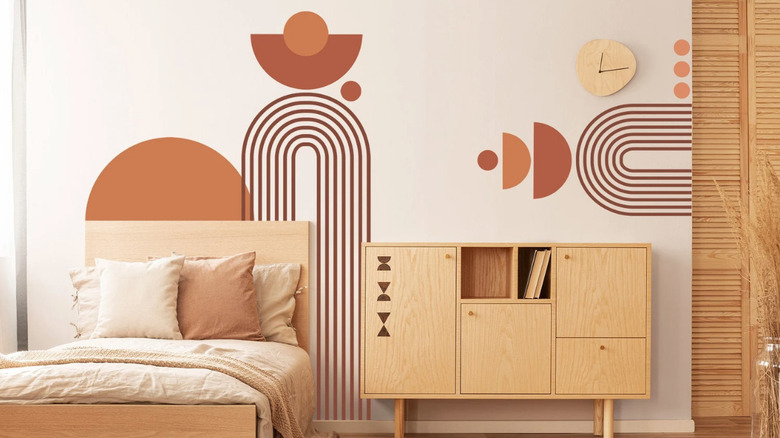
Wall decals are essentially stickers, but before you write this idea off, hear us out. They make some pretty artistic and stylish decals, so don't worry — we're not suggesting you haphazardly empty a sticker book onto your wall. Whether you want a stunning floral piece or a modern abstract design, you'll be surprised by just how many mature decal options are out there. There is also a lot you can do in terms of placement — play into any architectural features on your wall, or even have the decal wrap around a corner.
Though putting up a wall decal is pretty simple, it's still important that you do it correctly so that it looks smooth and lasts. Designhill recommends cleaning the portion of the wall where you'll be sticking it. Once you remove the backing paper and have the decal positioned where you want it on the wall, take a squeegee or credit card to smooth out any air bubbles, moving from the center out. Now remove the transfer paper carefully, and you're good to go.
Use washi tape
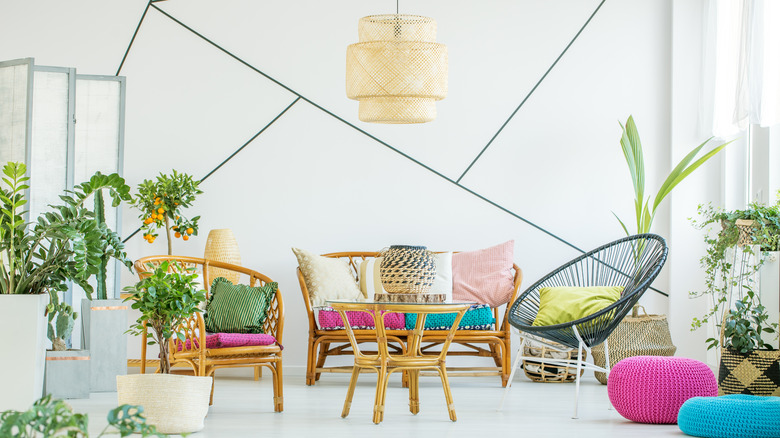
Washi tape is a type of Japanese masking tape that's usually used for decorative purposes. It's super sticky but leaves little to no residue, making it perfect for creating art on your wall. It may seem a little odd to decorate your walls with tape, but as you check out some examples, you'll see it's actually much cooler than you think. It's also pretty non-committal (perfect for renters who can't paint their walls) and less expensive than a decal (typically under $1 per roll).
Geometric designs work best for washi tape, whether you want to create some layered triangles for a graphic effect or a large-scale pattern. If you're going for a consistent pattern, Up to Date Interiors recommends marking out each shape's top and bottom points with a ruler and pencil. You can also cut 1-inch strips and place them all over the wall for a funky polka dot look. Considering the low cost of materials, feel free to play around with different designs when inspiration hits.
Put up floating shelves
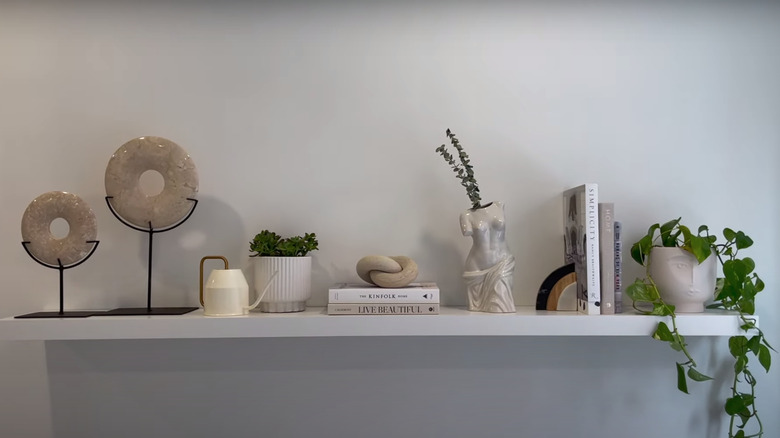
Floating shelves let you put all sorts of things on display as decoration and give you the flexibility to change vignettes whenever you want. Floating shelves of all lengths, widths, and colors are available, so it'll be easy to find ones that work with your wall space.
Of course, since these shelves function as wall decor, you want to make sure you style them well. When styling a shelf above her couch, Kirsten Ashley really emphasizes balance. You don't want everything to be symmetrical, but be aware of the heights of the objects on the shelf and ensure all tall objects aren't grouped on one side. Though height is one thing to look for when it comes to balance, another is color or the type of object it is. To balance out a larger plant on one side, she adds a few other small touches of greenery throughout. She also advises playing around with depth — have some objects farther back against the wall and others a little more forward.
Create a hanging photo display
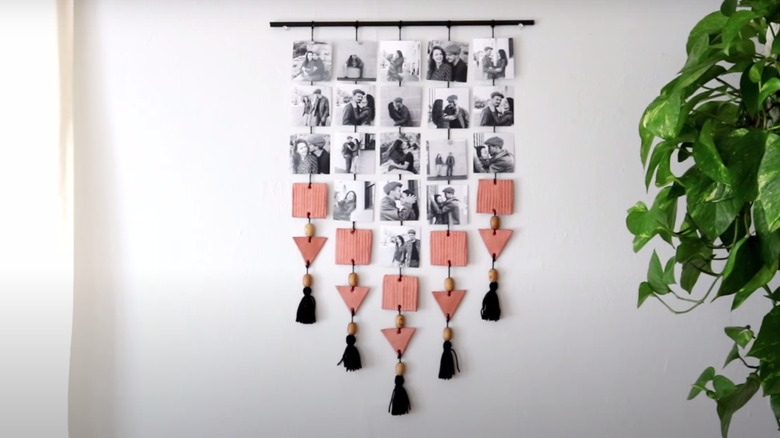
Just because you're avoiding framed art doesn't mean you can't still put photos on display. There are many great ways to do this, and we're not just talking about using tape to stick pictures to a wall (though washi tape can work great for that).
One idea is to use pants or skirt hangers — either the ones with clips or a clamping bar — to hang photos or art prints. Simply put some small nails in the wall for the hangers, or you can do something more statement-making like hooks or knobs. If you like the look of string lights, Lights4fun suggests stringing lights from side to side, using nails as anchors on each end. Then, simply clip or tape small photos throughout the cord. Another easy craft we love comes from Dossier and involves hanging pictures attached to a string from a branch or dowel. Small images from a Polaroid or Instax camera work great for this.
Use wallpaper to mimic the look of a brick wall
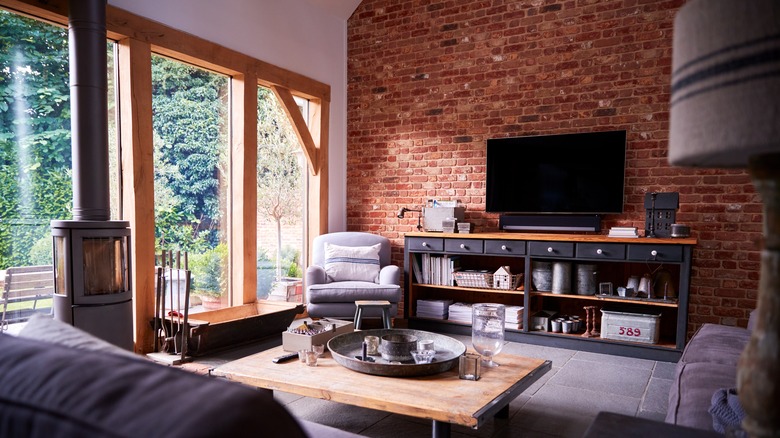
Give your home a (faux) renovation by using wallpaper that looks like brick. Many high-quality brick wallpapers on the market are very realistic, so you don't have to worry about them looking cheap or obvious. Not only does using this kind of wallpaper decorate your wall, but it also adds an element of texture. As Walls Republic notes, it adds a sort of sensory experience, which can really transform an entire room. Plus, since it's only wallpaper, it's not permanent, so you can always change it as your style evolves.
There are different aesthetics you can choose from when it comes to brick wallpaper. You can go for a traditional rustic red brick or a contemporary white brick. For a bold look, go for black brick, or opt for a light gray industrial brick for a more rugged vibe. This type of wallpaper can truly be used in any room of the house, from the bedroom to the living room.
Use paint pens to DIY wall art
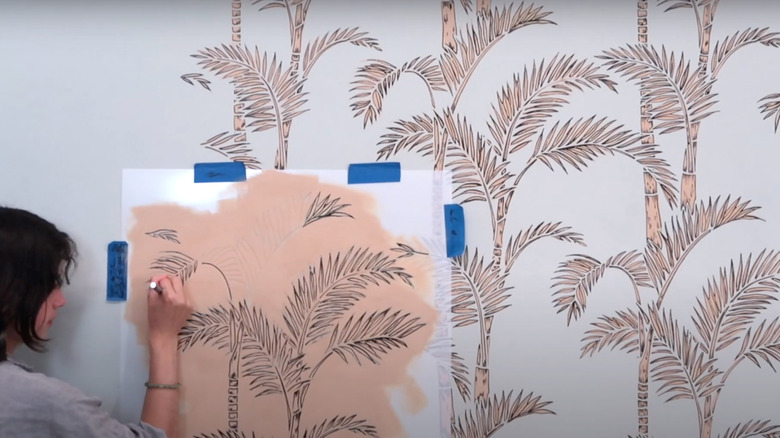
We've already covered ways you can use paint or tape to decorate your walls, and now we're on to paint pens. If you don't have the budget to invest in printed wallpaper, you can make your own with the help of a pen! You can absolutely freehand something, but if that sounds a little too intimidating, then reach for a stencil. Of course, you can purchase a stencil, but you can also easily make one. As A Beautiful Mess walks us through, you just need a large piece of cardboard and an X-Acto knife.
Figure out how many rows of the stenciled pattern you want and its height, and then cut the piece of cardboard to match the height. Next, use a flat edge (like a ruler) to cut out your shape. From there, you can simply put your homemade stencil on the wall and get to work creating a pattern with your paint pens!
Hang hats on display

Who knew accessories could make for such great wall decor? If you have a collection of hats, you can make a hanging hat holder that doubles as a cool piece of wall art. You just need a copper pipe (or any kind of pipe, depending on your aesthetic), string or twine, and clothes pins. First, you want to use the string to attach a triangle shape to the pipe — that's how you'll hang it. Next, cut three long strips of string that will dangle down from the pipe and serve as the place where you'll attach your hats. Before tying the strips of string to the pipe, lay them out on the floor and decide where you'll attach your hats. Then secure the clothes pins to the string in those locations by either feeding the string through the hole in the pin or tying it with a knot. Now you're ready to tie the string to the pipe and hang your hats!
Jaclyn De Leon Style notes that you should start with longer pieces of string because you can always cut them down later. Also, consider how heavy your hats are and be sure to balance the weight.
Make an art piece from thrifted baskets
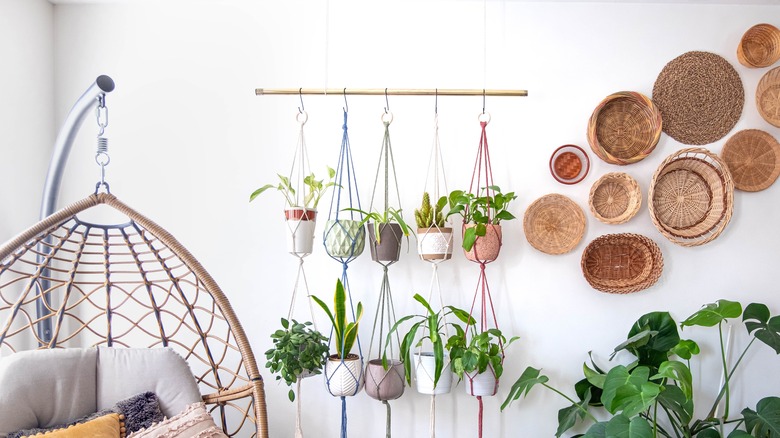
Another unlikely item that can work as wall decor is baskets — thrifted baskets, to be specific. Just like Delaney Lane did when sourcing materials for her basket wall art, you can score a handful of baskets from Goodwill or your local thrift store for less than $10. Before you start shopping, consider the wall you'll be decorating and decide on the general size of your basket decor.
Once you return home with your thrifted baskets, lay them on the floor in the layout you want. Some things to consider are whether you want the baskets to touch or not and what kind of formation you like (Pinterest is great for inspiration). Since baskets are so light, you can even use clear push pins to attach them to the wall, which means no hammer or nails will be involved! Another tip from Delaney Lane is to take a picture of the basket layout you put together on the floor so you can use it for reference when you start attaching them to the wall.
Hang a rug on the wall
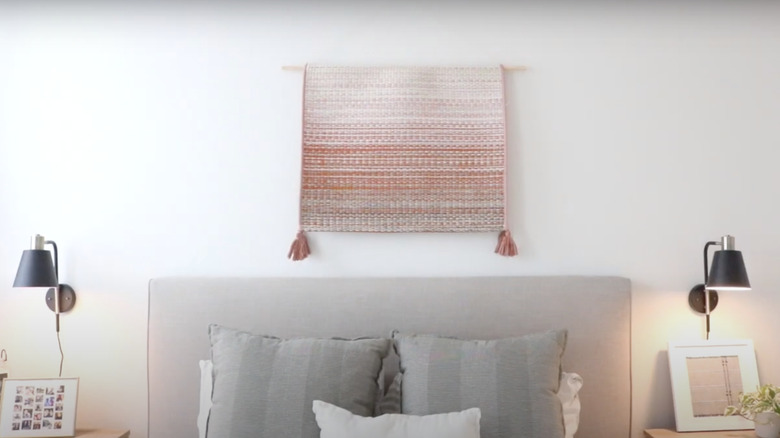
Think outside the box and use a rug as wall decor. As The Gem Picker notes, there are many reasons why hanging a rug on your wall is an excellent idea. First, they add an element of texture to the wall — even if it's a thinner rug, it will certainly be more textured than a framed art print. Second, since rugs are made of materials like cotton and wool, they bring some coziness into the room. Third, they will absorb sound, much like a rug does on the floor. And lastly, hanging a rug on your wall makes for an epic statement piece, especially since there are some pretty gorgeous rugs out there.
To hang the rug, The Gem Picker recommends a few different methods. You can use a sliding bar to hang it like a curtain, carpet tack strips you can attach to the wall, or velcro strips if you want to avoid putting holes in the wall (though velcro won't be great for super heavy rugs). We recommend checking out the clearance section at stores like HomeGoods and TJ.Maxx for some cheap finds.
Make your own letter board
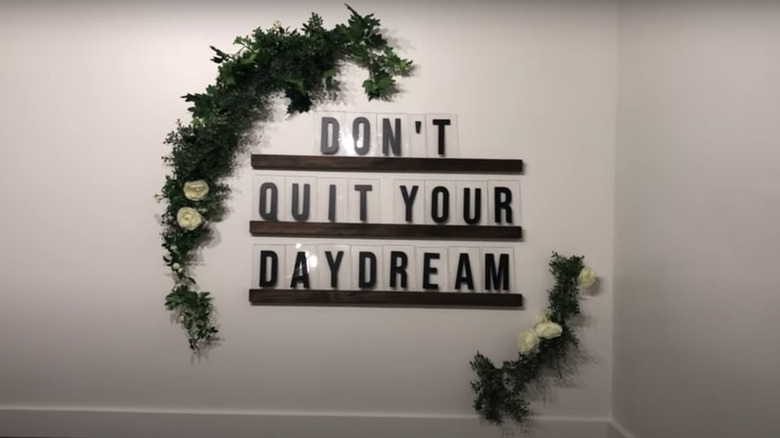
Make a statement with a DIY wall letter board. Instead of just attaching a pre-made letter board to the wall, you'll want to put up picture ledges where you can prop up the letters. This allows you to change your signs more easily, giving you more flexibility with your decor. Sengerson notes that large acrylic letters can be quite expensive, but you can make them yourself using transparency film with vinyl letters or even print your own on thick card stock.
Depending on your style, you can go as big or as small as you want. We love that you'll be able to change the words whenever you want and customize it for whatever room the letter board is in. We also have a feeling it'll make for a great photo background at house or dinner parties! Everyone loves an Instagram opportunity.