9 Things In Your Family Room You Should Be Cleaning Weekly
We may receive a commission on purchases made from links.
Kitchens may be the heart of the home, but family rooms are the soul. From kids playing and watching TV to loved ones holding thoughtful, late-night discussions, these rooms see plenty. But this cocktail of beautiful memories leaves behind a bitter aftertaste of clutter and mess. A mess that, if let be, defaces your home's aesthetic, making for poor impressions on visitors. Not to mention, it adversely affects your mental wellbeing, given the incredulous, but delicate, correlation between outer chaos and cluttered minds.
Subject to an array of activities (and people!), your living room's furniture, windows, mirrors, sofas, knick-knacks, couches, electronics, and window treatments double up as nest eggs for dust bunnies, necessitating weekly cleaning. But if you put this task on the back burner, you wind up with a home that's an active breeding ground for disease-causing microbes with poor indoor air quality. So, before things come to a head, declutter daily as you walk about the space. Also, skip the "I'll take care of it tomorrow" attitude for pet dander, spills, wrappers, and major trash. Come the weekend, don your gloves, gather cleaning supplies, slip on your headphones, and start checking things off from the following list — though, feel free to personalize by moving certain items to monthly cleaning lists if they don't gather much grime. And don't forget to clean your tools afterwards!
Buff glass surfaces for a pristine look
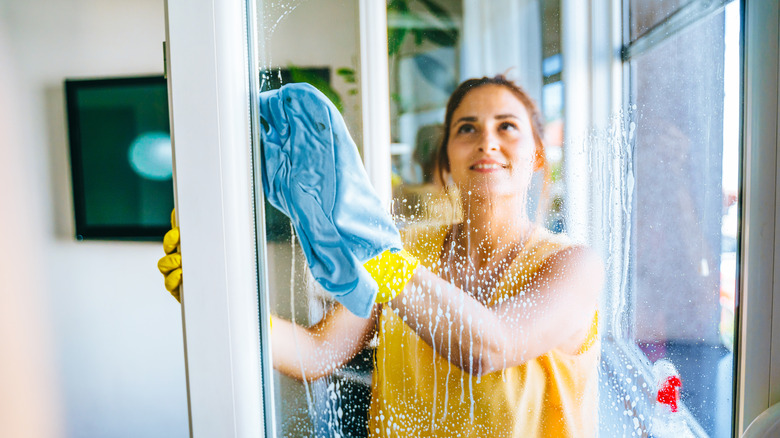
A classic décor rule to brighten a room is to strew around a few windows and mirrors. But you can kiss the light goodbye if you don't clean their glassy surfaces. With curious pets and naughty kids around, preventing windows from exhibiting paw and fingerprint mosaics before the week ends is impossible. Plus, if you happen to be the "love me some candles" type, are into smoking, or live in a polluted location, the dust and grime buildup is going to be way higher (than routine). So, cleaning the windows and mirrors weekly (or sooner!) is essential, lest the glass etches diminish their structural integrity.
To keep your mirrors and windows streak-free while cleaning, remove dry dust with a feather duster. Next, go in with a spritz or two of an ammonia- or alcohol-free cleaning solution like Windex (available for under $5 on Amazon). Alternatively, combine water and vinegar in a 2:1 ratio in a spray bottle to make a DIY cleaner. Use a microfiber cloth or a squeegee, start at the top, and wipe in "Z" motions — avoid using circular movements as they leave behind streaks. Don't use newspapers or paper towels since they don't provide a clean finish. While you're at it, wipe the window sills with the DIY cleaner to dissuade the spiders from spinning elaborate cobwebs. However, switch the vinegar with rubbing alcohol if the sills are made of granite or stone.
Tidy up the window treatments
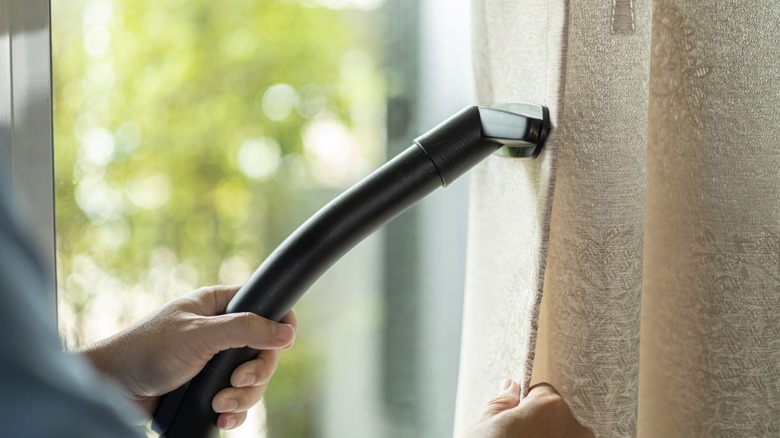
If your windows attract dirt weekly, there's no way the window treatments could escape their fate, right? After all, they make the two sides of the same coin. The constant opening and shutting of blinds, curtains, drapes, and shades leave them covered in oil deposits (courtesy of your hands), turning them into a magnet for dirt, filth, and allergens (like pollen). The roaming creepy crawlies aren't doing them any favors, either. Besides, failing to clean the window treatments will date your home since getting out stains is a tall task once they've fully set in.
To avoid such an outcome, dust the window coverings weekly — delay if you've installed dust-resistant treatments, such as artificial wood shutters or Roman shades. Follow up on the act with a HEPA filter vacuum cleaner. Barring wood blinds and most curtains, spot clean any stubborn smudges with a soft cloth dunked in soapy solution. However, it's best to stick to the manufacturer's instructions. As for the shutters, clean the slats from left to right after closing them in one direction. Repeat the process in the opposite direction. Unless there's a major spillage demanding an immediate trip to the dry cleaners, stick to deep cleaning them annually.
Wipe down the furniture
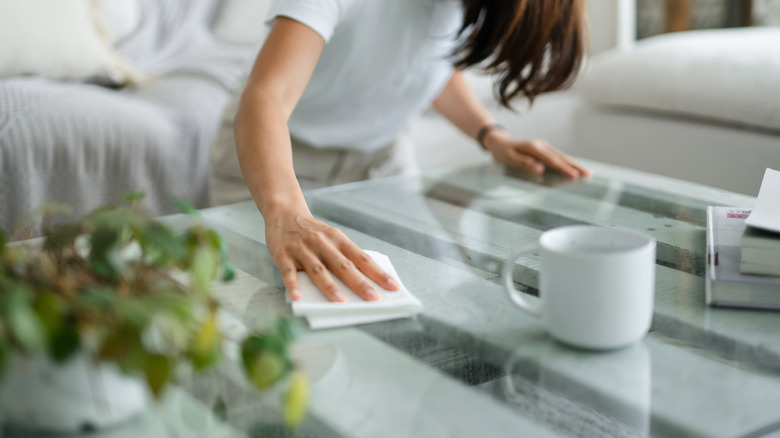
Your coffee tables, side tables, chairs, and their ilk are no strangers to accidental spills, stray food crumbs, dirt, and greasy stains. While you should dust your furniture daily, life and jobs get in the way, and the cleaning task slips down the priority list. If so, make good on the errand once the work week is off. But ensure you remove books, coasters, and décor items from the furniture to get all the dust out.
Regardless of whether the furniture is made from wood, metal, or stone, rub it down with a moist — not wet — paper towel. Although you can use an all-purpose cleaner, err on the side of caution by testing it on an inconspicuous spot first. Skip dry dusting, especially with feather and reusable cloth dusters, as they merely redistribute the sand and dust around instead of gathering it up. Another option is to suck up the dirt using a vacuum cleaner with a brush attachment. That being said, don't put off eliminating coffee or wine rings the moment they become noticeable. Combine non-gel toothpaste and baking soda in a 1:1 ratio, and apply the paste over the stain with a clean microfiber cloth. Use another cloth to rub the stains and buff the area. This should get most of the stains out. But if the stains are particularly stubborn, cover them with mayonnaise and wipe with a fresh cloth the next morning.
Spruce up the seating
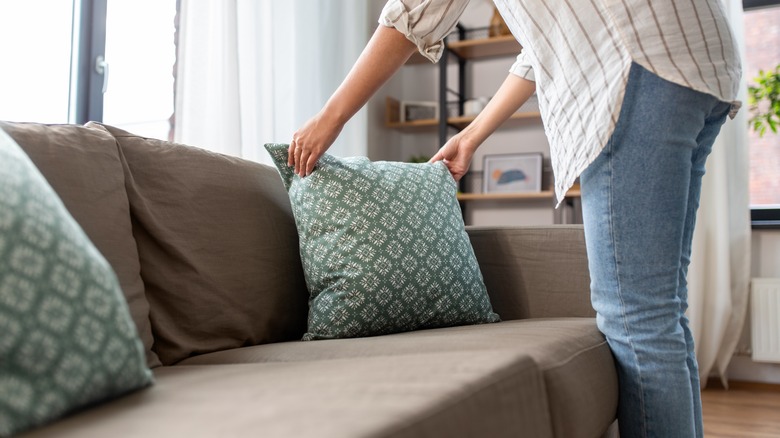
Fumbling around the couch for the remote only to come up with fingers coated in sauce or popcorn powder isn't anybody's idea of me-time. But when snacking over upholstery furniture like the couch, sofas, and armchairs is the norm, that's precisely what you get, even if you clean up after. Besides food crumbs, pet hair and dander, dust mite carcasses, human hair (and dandruff), lint, and even microplastics will find their way into the deepest nooks and crannies of your seating. While you might not see them superficially, they will huff out if you jump or sit down excitedly.
So, when the weekend's around the corner, straighten up your seating by plumping up the cushions and pillows. This will break apart any clumping fibers. If the labels state they're machine washable, pop them in and run a gentle cycle. Fold all throw blankets and slipcovers and keep them aside. Next, spot clean stains with a damp cloth — again, look at the labels to know whether it's safe to use water (W) or a solvent-based (S) cleaner. Don't go hard, especially when handling delicate fabrics like velvet or linen. Finally, vacuum the couch (don't forget the corners!) after replacing its nozzle with an airflow brush or a crevice tool, so it can weed out debris from the hard-to-reach areas.
Keep all electronics spick and span
If your family room doesn't see much light, it's easy to miss the smudges, fingerprints, and dirty streaks lining your TV screen — until a dark scene comes on, and you can't figure out if the fault lies with the grain or the display. Worse, the grime builds up with time, becoming harder to clean. Since you don't want to clean the delicate modern screens aggressively, save yourself a massive replacement bill by cleaning the TV screen weekly. Power it down before you begin, in case you've been playing Netflix to ease the chore.
Using a microfiber cloth or Swiffer, dry dust the display screen before any particles etch it. Bring a screen-friendly cleaner free from acetone, alcohol, and ammonia and spritz it on the lint-free cloth. Wipe the screen top down. Flip the cloth if it begins to push the dust around instead of picking it up. Avoid applying the liquid directly to the display or overusing it. If you'd rather not risk it, switch to pre-moistened electronic wipes (available on Amazon for under $6). Also, don't fall into the out-of-sight, out-of-mind trap. Vacuum clean the TV's back, including the ports and cables, using the soft brush attachment. Wipe down the buttons with a rag. As for the speakers, run a sticky lint roller over them to get out the fuzz. But if the material's too rigid, swap it out with a damp, microfiber cloth.
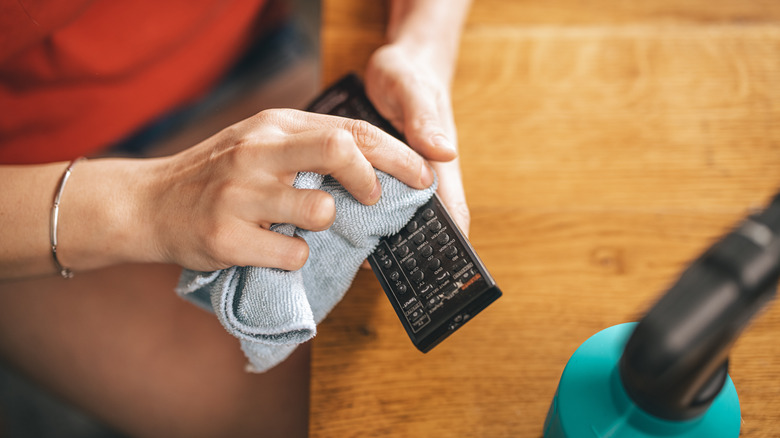
Sanitize high-touch surfaces

Moving on to the part of your home that you aren't cleaning enough, despite touching it several times during the day: light switches. As surfaces harbor scores of disease-causing coliform and aerobic bacteria, your light switches handsomely beat toilet seats on the filth scale. (Take a moment for the disgust to sink in.) TV remote controls and game controllers aren't any better, collecting germs and microbes left and right whenever possible. Oh, and don't forget the door handles leading the way to jubilant family time.
To leave your high-touch surfaces clean as a whistle, the first step is to remove the batteries from remotes and controllers. Now, spritz an all-purpose cleaner on a microfiber cloth and use it to wipe the switchboards and remote controls. As for the door knobs, you can substitute the cleaner with a mild soapy solution. Run your fingertips or a Q-tip along the length of the microfiber cloth to work it under the switch or between the buttons. Follow the label instructions and let the liquid sit for some time before wiping it. Finally, dab with a disinfecting wipe for complete sterilization. Alternatively, DIY a disinfectant by mixing one part rubbing alcohol with one part water. Replace the batteries once the remote is dry.
Dust home accessories

Before powering on the vacuum for the floor's weekly cleanup, lightly dust all the décor items. This includes bookshelves and book sleeves, although you can save the laborious process of removing all books one by one for the deep cleaning routine. Additionally, use the vacuum's crevice tool fitting to suck up the dust collecting on the shelves' front. Next, rub a lint-free rag on picture frames, wall art, and lamps to clear off the accumulated dust. To get the best, streak-free results, wipe top-down and left-to-right. Don't forget to clean outer shelves, TV stands, and other curios.
Take the time to clean your dusty houseplants, too. Don an unassuming pair of cotton gloves to remove the accumulated dust or muck collecting on the foliage. Once they're clean, use a spray bottle to sprinkle water on the leaves and go over them again with another pair of cotton gloves. Remove any dead leaves (or bugs!) and pour in a leaf conditioning solution if the need arises. Use a damp microfiber cloth on the pot if the material allows. Finally, get a step ladder to dust the wall-mounted light fixtures and ceiling fans to keep them glistening.
Vacuum the area rugs and carpets
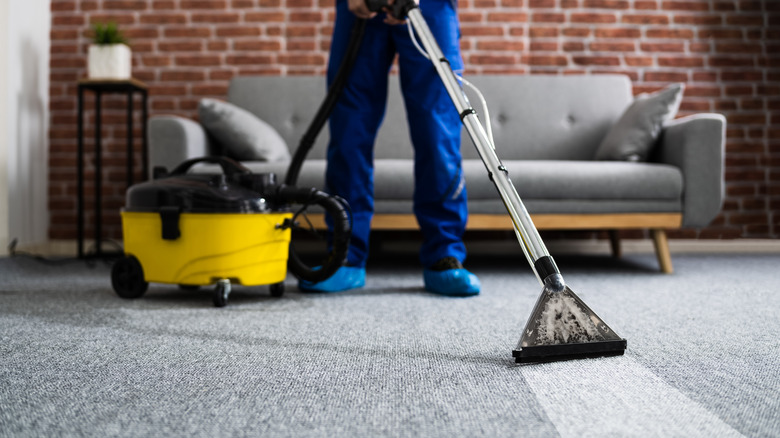
Watching kids play with their toys is sure to warm your heart and dirty the carpet. Accidental wine spills and food droppings by jovial guests don't help your case, either. Ideally, you should clean the carpet stains immediately and vacuum the area daily if your living room experiences a lot of traffic. But if that's a hard pass, remove the soil, dirt, and allergens before pesky bugs think they've found a new home.
If your carpet is particularly flimsy or old, use the upholstery attachment to avoid damaging it further. Also, move in line with the nap (the raised carpet threads) instead of against it, unless you don't mind cutting its life short. Run a soft-bristled brush over the hairy fringes instead of a vacuum. Switch to a handheld vacuum cleaner for heavily tufted rugs. Likewise, swap in an upright vacuum for carpets thicker than ⅜ inch. In case your vacuum creates a suction, stop all movement and raise the power head's height (if there's an option) or adjust the suction control's airflow. Vacuum in straight lines to keep streaks at bay.
As for the rugs, roll them up and take them outdoors. Now, channel the week's frustrations and transgressions and beat the dusty rugs hard to bid the dirt goodbye. Apply baking soda the night before your weekly cleanup if the soft surfaces stink before vacuuming in the morning. You can get away with cleaning the carpets and rugs' undersides bi-annually.
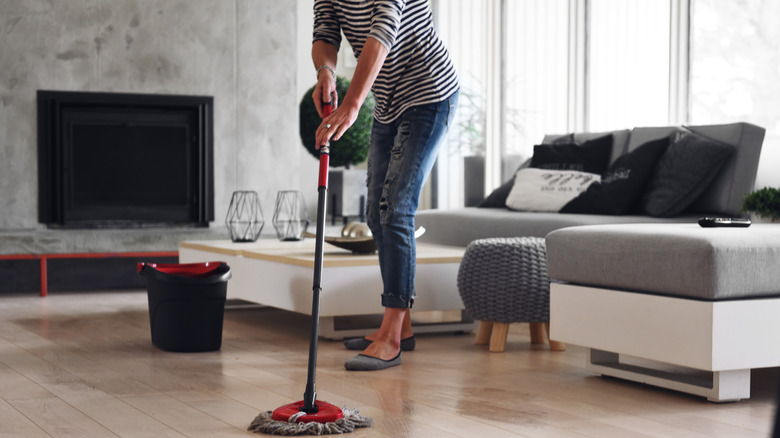
Sweep, mop, or vacuum the floors
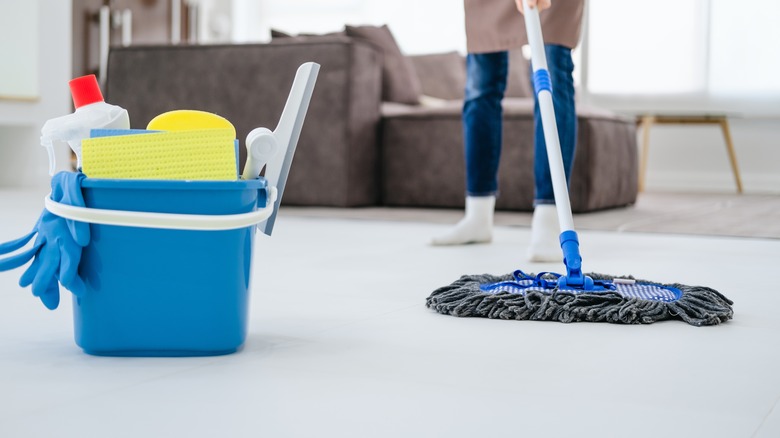
Lastly, sweep things under the rug (not literally). Use a broom or mop to clean the floors while your rug is soaking in some sun. Who knows, you might even come across rogue Lego pieces, lost earrings, and a few pennies. The reason you're better off dealing with the floors last is because it provides an opportunity to pick off any residual dust that may have dropped down while cleaning other fixtures and fittings.
To keep your floors looking new, work your way from the family room's farthest end to its entrance. After completing a 4x4 square foot section, rinse the mop in a disinfectant solution and continue until you've covered the whole room. Ensure you don't miss corners or hidden spots. Once in a while, steam the floors to keep them looking clean for longer.
But, of course, a damp mop isn't compatible with all floor types. For instance, if you have waxed hardwood floors, going over them with a damp mop can damage the surface. Under such circumstances, grab a vacuum cleaner or dry mop (a broom works, too) and target the dirt, soot, insects, shed fur, and allergens to get rid of all filth.